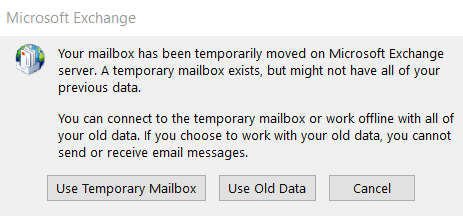
While configuring with Office 365, Outlook keeps asking about a temporary mailbox issue. Many users face the “Your mailbox has been temporarily moved on Microsoft Exchange Server” issue. This “use temporary mailbox outlook error” appears when the Outlook profile gets corrupt or automatically configures with Microsoft Exchange Server.
Here in this blog, we’ll describe some manual ways which will help you to repair the “your mailbox has been temporarily moved Exchange” issue.
How do I remove the temporary mailbox message?
To remove this temporary mailbox message, users can use some troubleshooting ways. When an Office 365 user access Office 365 and this error appears, the user receive the following message 
Methods to Resolve this Issue
- Delete all Outlook profile accept the primary account
Users can sort out the “Your mailbox has been temporarily moved on Microsoft Exchange Server” problem. By deleting their all Outlook profile except the primary account. Follow the steps to delete the Outlook profile.
- Exit Outlook and open the Control panel.
- Now click on the Mail option, then click on the Show Profiles button.
- A dialog box will appear, choose the profile which you want to remove. And click on the Remove button. (A warning message will pop up. Click Yes to continue).
- If you have many Outlook profiles, then repeat the 4th step again and again.
(NOTE: Do not remove your Primary profile)
- After you remove all the profiles except the primary one, then click on the Ok option in the dialog box to close it.
- Now start Outlook and check if it works.
Note: When the user removes a profile from Outlook, the data file for that account will also be removed. Before starting this task, make sure that you back up the data, or you don’t need the data again.
In case this method doesn’t work, you can also resolve the “Your mailbox has been temporarily moved on Exchange Server” issue by Enable the Cached Exchange Mode.
Enable the Cached Exchange Mode
Pursue the steps to enable the cached Exchange Mode:
- Firstly, exit from Outlook.
- Open Control Panel and click on the Mail option.
- A dialog box will open, now click on the E-mail accounts option.
- Choose your account and make a double click on it.
- Now check the Cached Exchange Mode box. If this option is already enabled, then first disable it then enable it. Now make a click on the Next button.
- Now restart Outlook and check if it works.
These are the two manual methods which you can use to eliminate this issue. After using any of these two methods, users will be able to access their Outlook. As we said, before using these manual utilities, users must back up their OST file data cause, but there are huge chances that you lose your mailbox data.
In case you lose OST file data while solving the “Your mailbox has been temporarily moved on Exchange Server” issue. You can use Shoviv OST to PST Converter to recover that mailbox. This tool is a master utility to backup the OST file and recovers the deleted mailboxes from an OST file. Users can backup their OST files before running the troubleshoot. This tool provides many features for backup and recovery of OST file.
Wrapping Up:
Sometimes users encounter the error “Your Mailbox has been temporarily moved on Microsoft Exchange Server” and get confused. To fix this error, proper technical guidance is a must. Here in this blog, we have provided all details about it. You can use Shoviv OST to PST Converter in case some of your data become inaccessible. Or in case you need to back up the OST file.
- How to Backup and Restore Emails in Webmail? - March 25, 2025
- How to Migrate Outlook to New Computer? - February 15, 2025
- Fix If Outlook Cannot Display the Specific Folder Location - February 1, 2025


