As we know, Webmail and Gmail serve the same fundamental purpose of providing email access via a web browser but differ significantly in features, integration, and security. This blog will explain how to add webmail to Gmail and continue the emailing journey with Gmail.
Webmail refers to any email service that is accessed through a web browser. Popular webmail providers include Yahoo Mail, Outlook.com (formerly Hotmail), and various email services provided by internet service providers (ISPs) or companies. Webmail is generally more straightforward and may vary in features based on the provider, making it suitable for basic email needs. On the other hand, Gmail offers a comprehensive suite of features and integration, making it ideal for users looking for a powerful, all-in-one email solution.
This blog will help you find an excellent way to log in Webmail in Gmail.
Why is it important to connect Webmail to Gmail?
Choosing between Webmail and Gmail depends on individual needs and preferences. Gmail is an excellent choice if you require robust features, tight integration with other productivity tools, and advanced search and security. Here is another reason why you should connect Webmail to a Gmail account:
- Offers substantial free storage (currently 15GB shared across Gmail, Google Drive, and Google Photos) with the option to purchase more.
- Gmail integrates deeply with the Google ecosystem, enhancing productivity through tools like Google Drive, Google Calendar, and Google Docs.
- Webmail needs more advanced features and integrations. Users find many features, including smart replies, priority inboxes, and advanced spam filtering in Gmail.
- Gmail’s interface is simple and intuitive, offering an efficient and clear user experience.
- Some Webmail services may not offer robust security features, making them vulnerable to spam and phishing attacks. Users are dependent on the provider’s server reliability and security measures. On the other hand, Gmail has strong security features, including two-factor authentication (2FA) and advanced phishing protection.
These are the reasons why you should configure Webmail in Gmail.
How to Add Webmail to Gmail?
Manual and professional are two distinct methods of adding Webmail in Gmail. Below is a comparison to help understand their differences and unique adding process.
Configure Webmail in Gmail Manually:
Gmail can act as your email client, fetching incoming messages via POP3 from your mail server and handling outgoing messages with SMTP.
Incoming messages (POP3):
- Enter your Gmail credentials to log in.
- Click on the gear icon in the top right corner of your inbox, then choose Settings from the list.
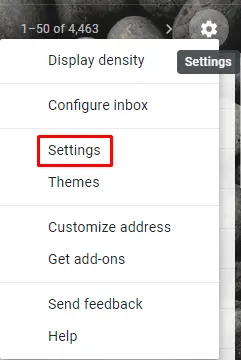
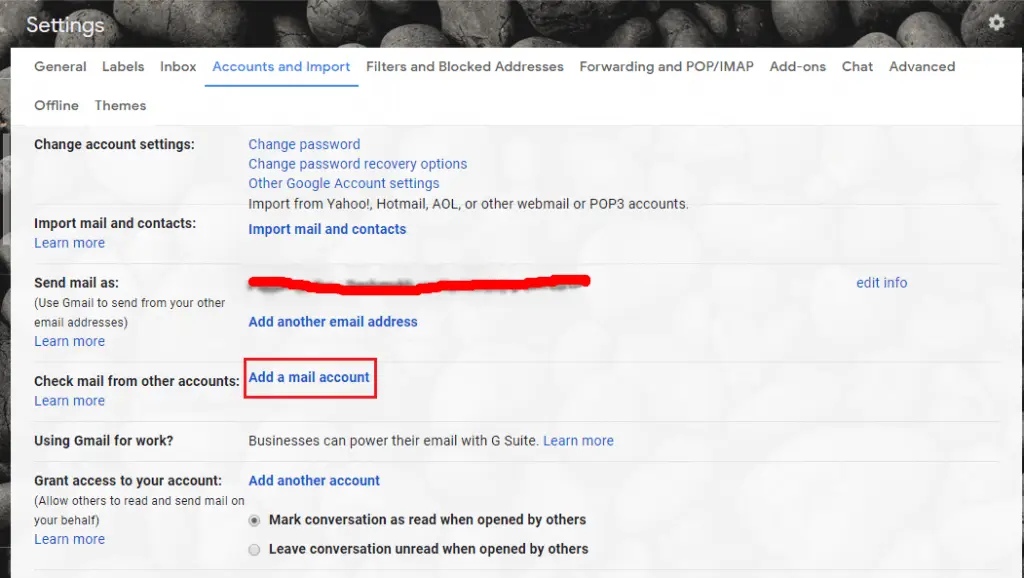
- Navigate to the Account and Import
- Select the option to add a mail account.
- A new window will pop up. Type your email address.
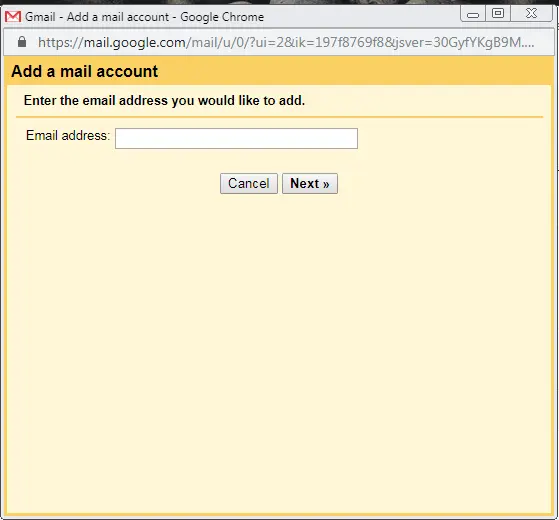
- Hit on the Next
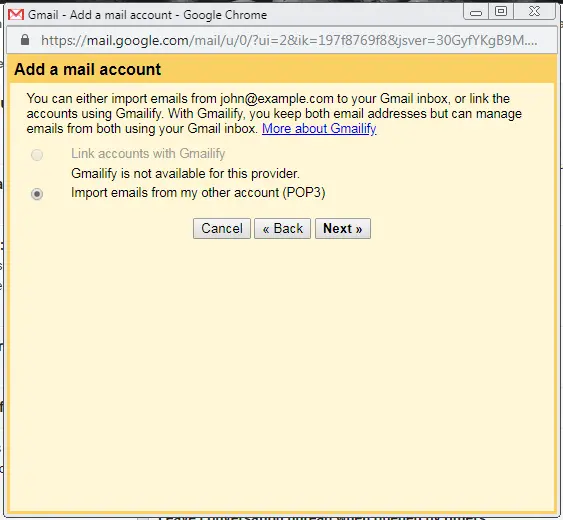
- Opt for “bring in emails from another account via POP3”.
- Enter your email address completely into the Username field.
- Also, provide the password for your email account.
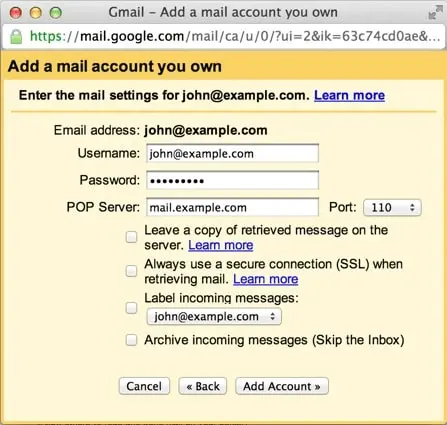
- Please enter the POP Server address. It will vary depending on whether you opt for the Always Use a Secure Connection (SSL) feature.
- Without SSL, the domain name starts with “mail.” If your domain starts with “mail”, it doesn’t have SSL.
- “With SSL, your server’s hostname is disclosed.” Ensure the port has been switched to 995. If you need clarification on your server’s hostname, head to cPanel. Check out the Stats panel located on the right side. You can view more details by clicking the expand stats link if it’s there. The hostname will stand out among the stats listed.
- Pick out the extra choices that appeal to you.
- Press the “Create Account”
Outgoing messages (SMTP) –
- Choose “Yes, I want to be able to send mail as john@example.com.”
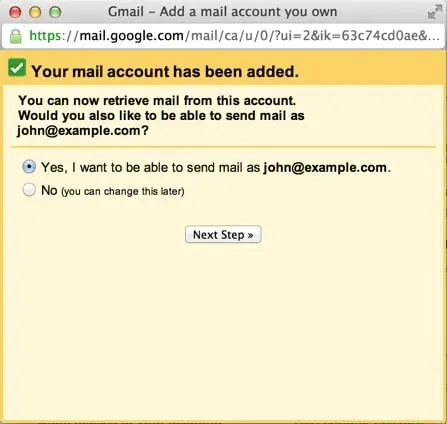
- Select whether you’d like to adopt this address as an Alias.
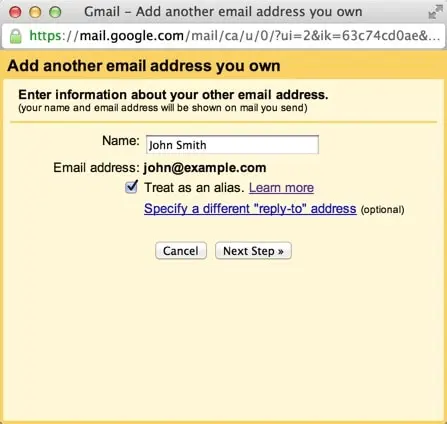
- Give the Add Account button a click.
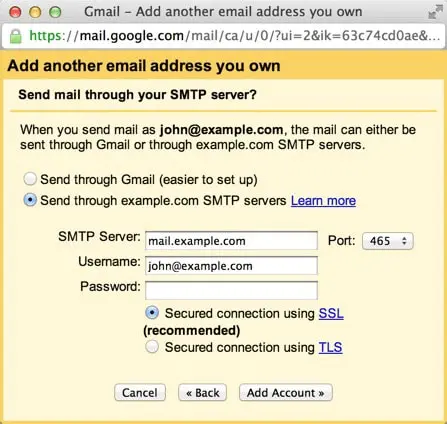
- Opry for “Use the SMTP server hosted at example.com.”
- Please provide the SMTP Server
- Without SSL, the domain name starts with “mail.” If your domain starts with “mail”, it doesn’t have SSL.
- “Without SSL, your server’s hostname is disclosed.” If you need help with your server’s hostname, head to cPanel. Check out the Stats panel located on the right side. You can view more details by clicking the expand stats link if it’s there. The hostname will stand out among the stats listed.
- Fill in the Username field with your full email address.
- Kindly input the password to access your email account.
- Decide whether to use Port 25, non-SSL, or Port 465, which uses SSL for encryption.
- Please choose any extra features you desire.
- Press the “Create Account” option.
Check your inbox for the verification code from Gmail that’s on its way to the email you’ve just registered. To proceed, follow the link to your email or manually input the code into the designated text box and click on Verify. It allows you to use Gmail to manage your incoming and outgoing correspondence.
We’ve discovered that the manual method could be more practical and fraught with several unavoidable problems. You have to choose a third-party tool.
Configure Webmail in Gmail Professionally: A Direct Way
Although we still have a manual approach, we are here with a professional approach to configure the Webmail to Gmail process to enhance speed and convenience. The manual method is quite a time-consuming process. To get things going easily, go with Shoviv Webmail Configure or Add Tool, AKA Shoviv IMAP to IMAP Migration Tool. This handy tool quickly migrates your Webmail emails into Gmail, saving you from manual work and getting the job done seconds later.
Advanced features of Shoviv Software
This software’s built-in features will protect users’ important information during every step. You will set up the process at your end and migrate with full data security. Moreover, you can:
- Add your emails from all IMAP providers, including Gmail, Yahoo, Zoho, and iCloud.
- There is no limit on the size of mailboxes you can configure and add multiple at once.
- Use the filtering options on this tool to get the exact outcomes you need.
- Once you’ve established a job, it assists in organizing the email migration process.
- You’ll find this software runs seamlessly on virtually all Windows versions.
- Shoviv’s IMAP to IMAP Migration Tool includes free technical support for users. Moreover, you can try it for free!
Process of Login Webmail in Gmail with Shoviv IMAP to IMAP Migration Tool
To open or log in to a Gmail webmail account, you can use Shoviv’s advanced software. With its straightforward steps, anyone can easily operate this utility regardless of their technical background.
Here’s a step-by-step guide to setting this up; let’s kick off the process:
- Commence by initiating the installation process for the Shoviv IMAP to IMAP Migration Tool.
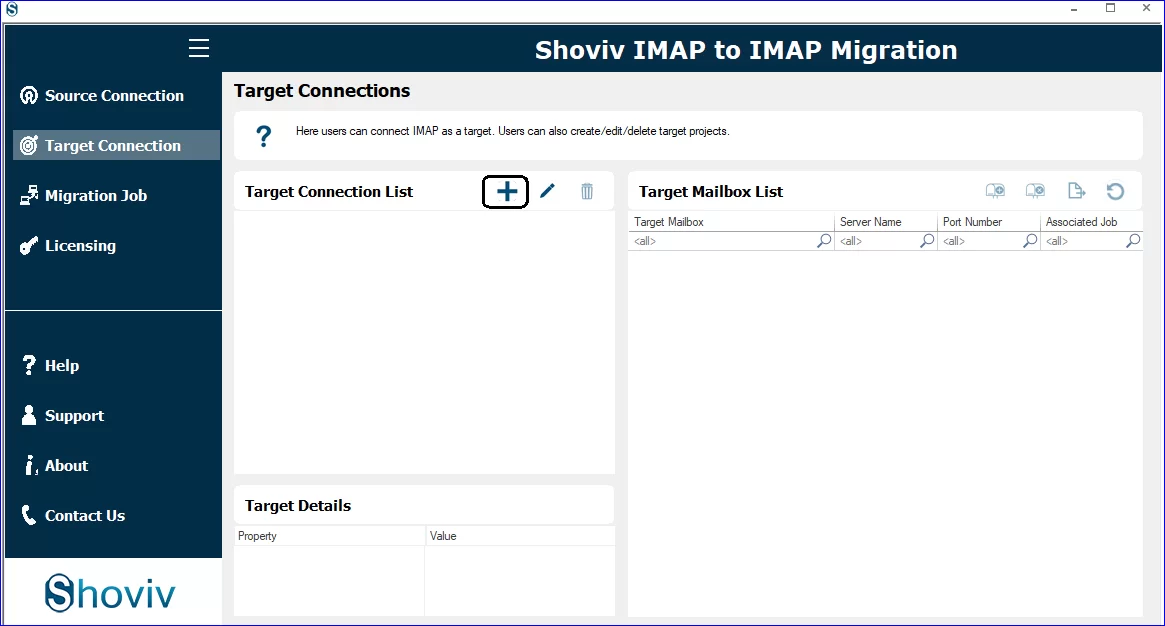
- Find your way to the Source Connection tab and give it a click to proceed.
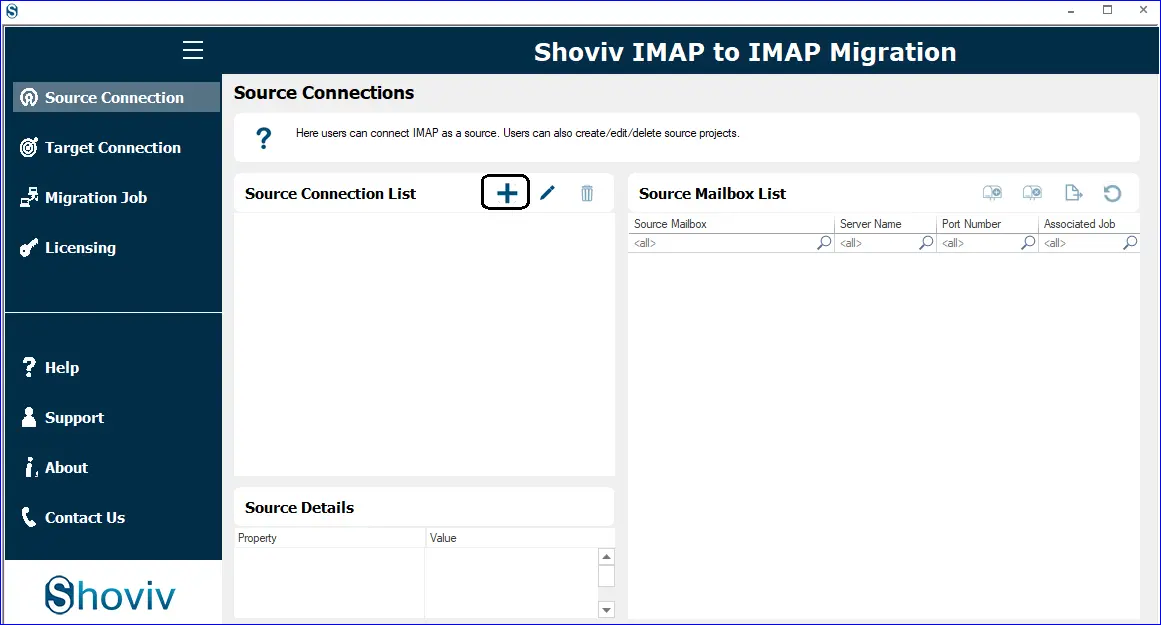
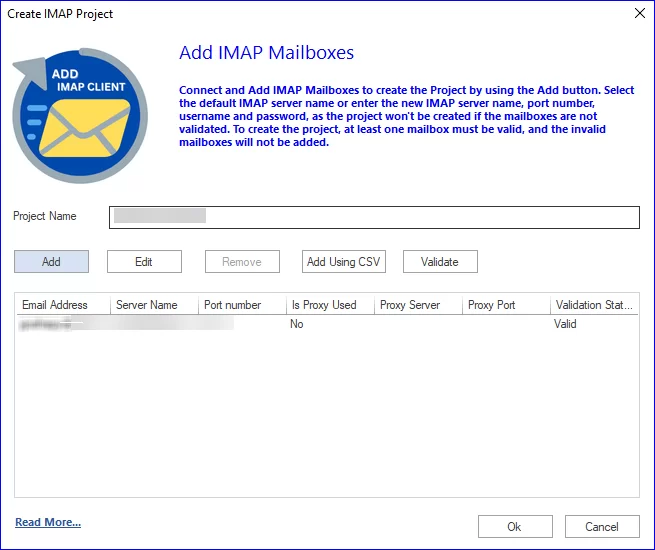
- Next, input the Project Name and press Add. Provide the server name and login details to connect with the source (Webmail).
- Apply the identical process to integrate the desired Gmail.
- Next, head over to the Migration Job and create a new migration job.
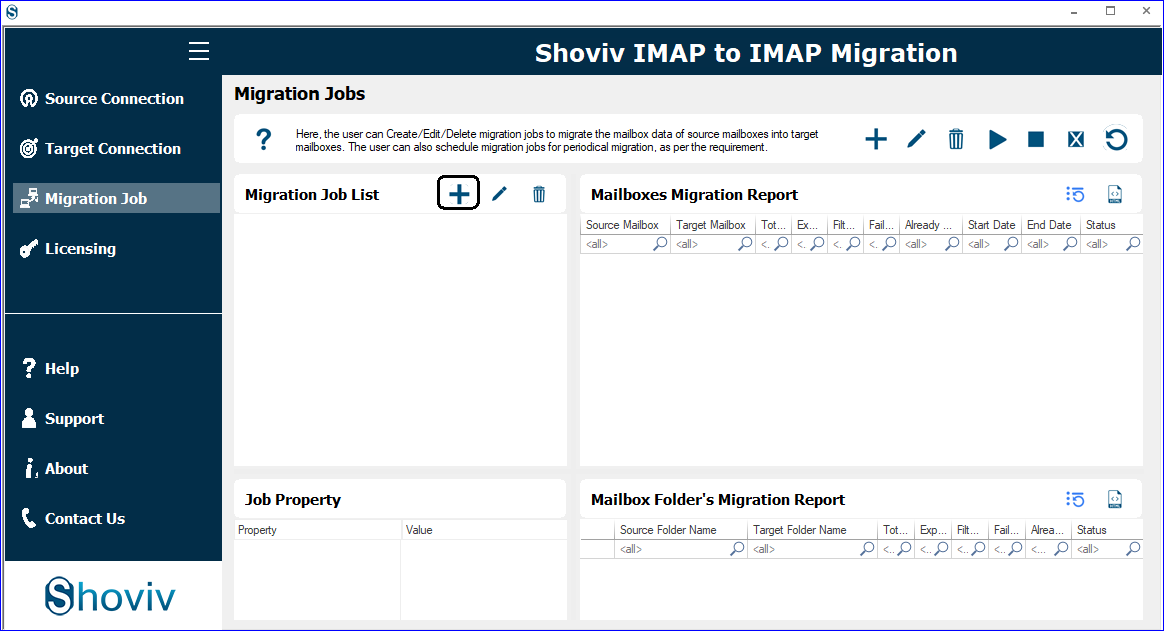
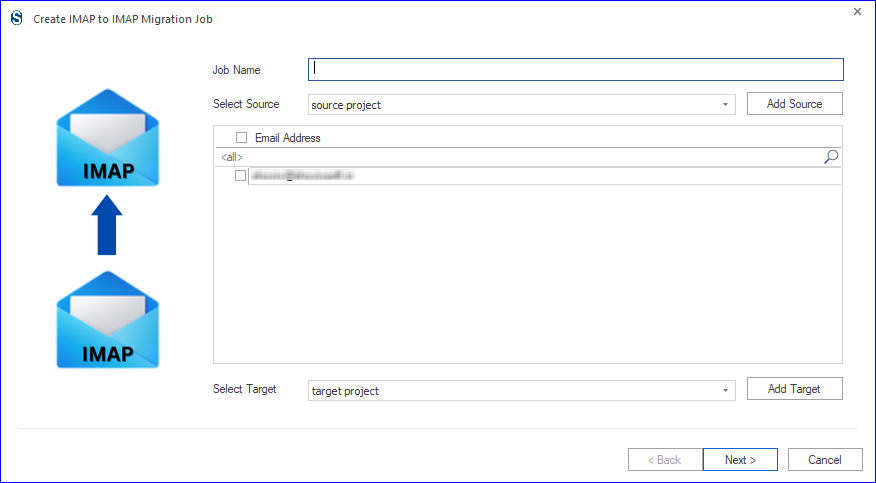
- Designate a job title, add the source, confirm the email address, and pick the target.
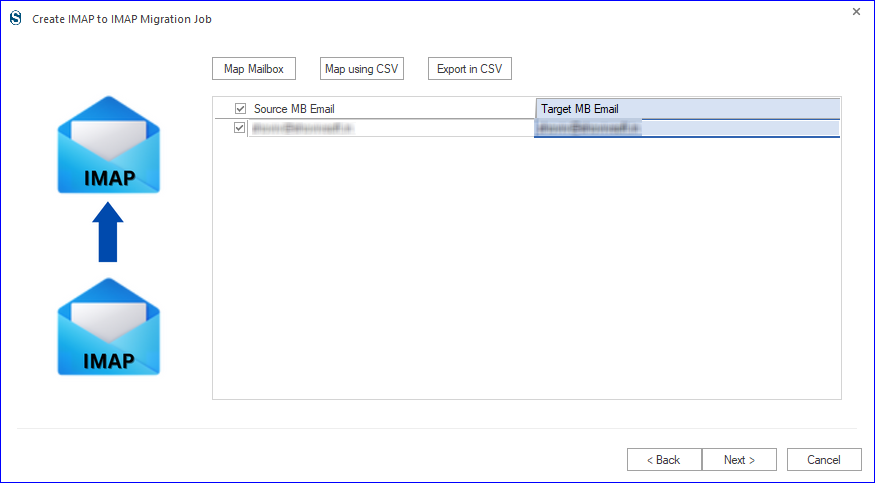
- Head to the mapping page to connect source and target mailboxes to continue. Click next to move forward.
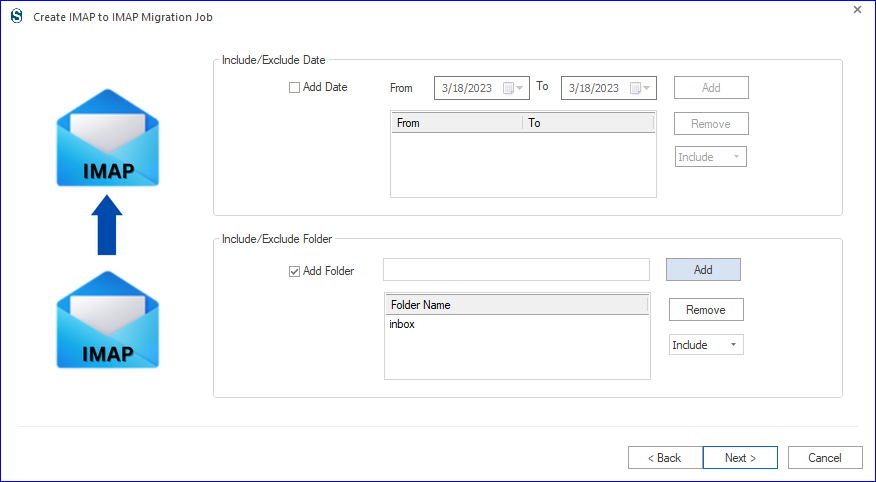
- Apply the filter if required, or skip it and proceed by clicking
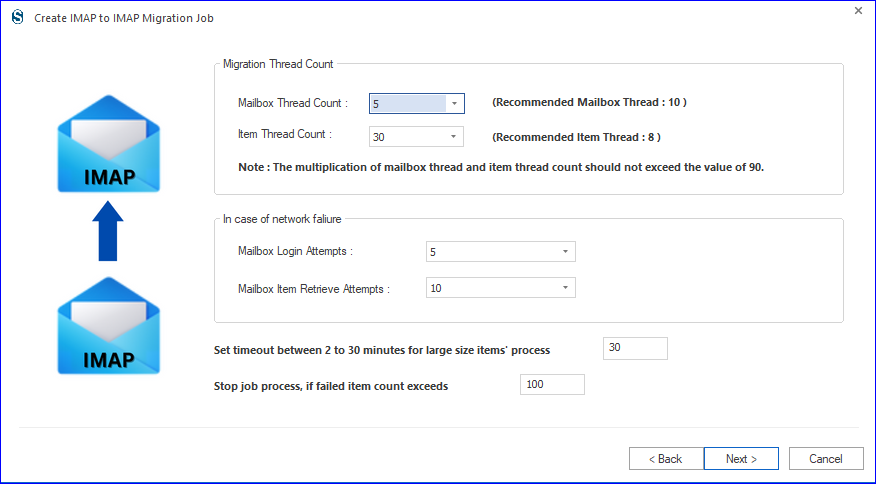
- They were navigating to the settings page to customize the migration job settings or leave them as they are by default.
- Decide how you’d like to proceed: manually initiate the job, start it immediately, or stick to the scheduled time.

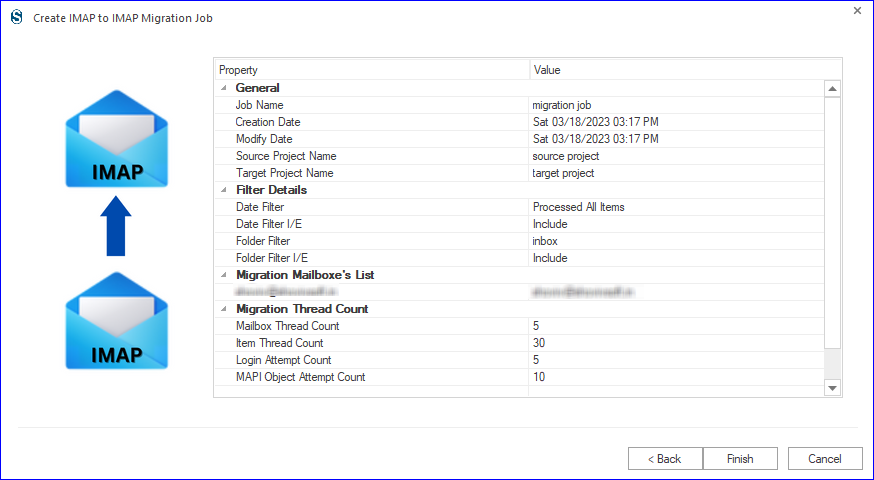
- Finally, brace yourself for an exciting glimpse of the migration task underway. Choose “Back” to edit or “Finish” to confirm and complete your selection. If you have selected “Run Job Immediately,” the migration will begin automatically; otherwise, it will follow the schedule set by the Run Job action.
After these steps, Gmail will begin receiving emails from your webmail account and this is the answer to how to add Webmail to Gmail.
Conclusion:
It concludes our guide on two methods to connect Webmail to your Gmail account. Consider different approaches and select the best fit for your needs and preferences. Use Shoviv IMAP to IMAP Migration Tool, which provides an affordable and effortless solution for enabling the easy configuration and addition of Webmail to Gmail. Try our tool’s free trial version to add your Webmail in Gmail and open Webmail in Gmail.

- How to Export Calendar from Outlook on Microsoft 365? - April 15, 2025
- Understanding Yahoo Mail Storage Limit & Back-Up Process! - April 10, 2025
- Mailspring vs Thunderbird: The Ultimate 2025 Showdown - April 3, 2025