Summary: Are you searching for a seamless way to transfer Google Drive to OneDrive data? If yes, this blog will give several tricks to achieve this migration task. We will elaborate on the manual and professional solutions in this guide to provide you with the best solutions to do this task.
Google Drive is a file hosting service that Google offers to keep your personal or professional information. It was launched on April 24, 2012, by Google, offering a 15 GB free storage facility to its users. Users can also extend the Google Drive storage by choosing the different subscription plans. But still, users look towards to Migrate Google Drive to OneDrive cloud-storage facility.
Behind this task, users have different reasons and requirements. Some of them are for business requirements, storage issues, and many more. Also, users get some other benefits by choosing OneDrive to do their work. That is also the reason why users want to perform this task.
If you want to know the complete procedure of how to move files from Google Drive to MS OneDrive, read this blog till the end. We will explain a few solutions to do this migration task in a simplified way.
What are the ways to sync Google Drive to OneDrive?
Basically, we use either a manual solution or a professional third-party tool to do this migration task. We will share different manual tricks to transfer Google Drive to OneDrive storage. The manual solution is free of cost that all users can easily use, but it has some restrictions, which we will also discuss.
In the next section, we will share the entire information on the manual techniques to accomplish this task. Then, we will learn a professional third-party tool to complete this task.
How to transfer Google Drive to OneDrive manually?
There are various manual tricks to move files to OneDrive from the Google Drive environment. Let us learn the solutions one by one to migrate Google Drive to OneDrive effectively.
Instant Solution: Safe and secure way to migrate your data from Google Drive to OneDrive.
Try Shoviv Google Drive to OneDrive Migration tool today!
#1: Google Takeout for moving from Google Drive to OneDrive
Before beginning the stepwise procedure, users must log in to Google Takeout with their account to proceed with this migration task.
Step 1: Click here and enter your email address and password to Log in.
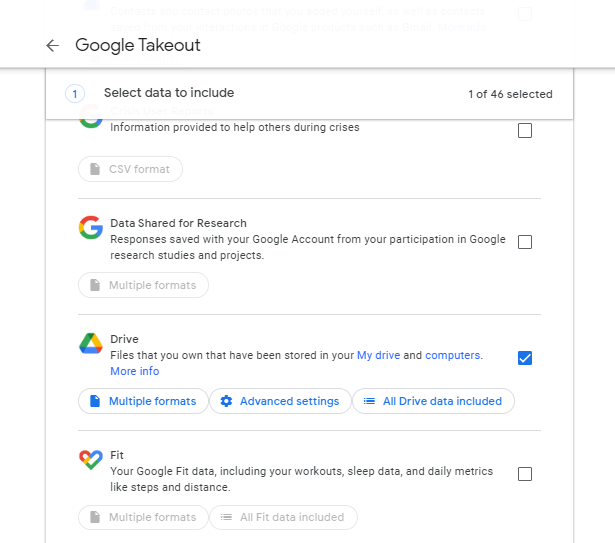
Step 2: Deselect all and choose the Drive option to export.
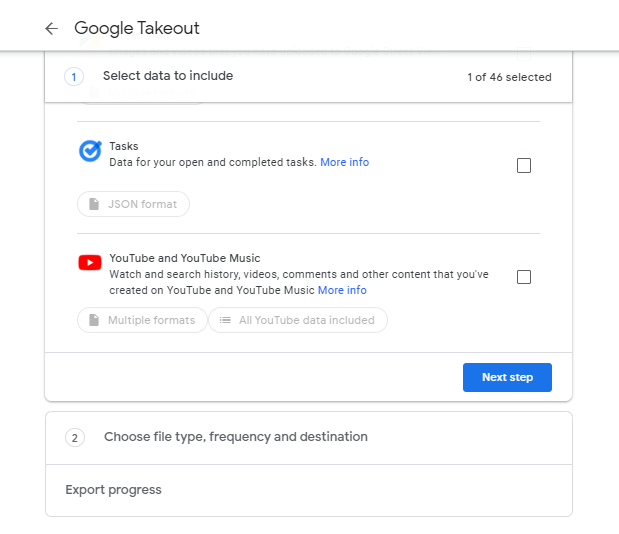
Step3: Then, scroll down and click the Next Step.
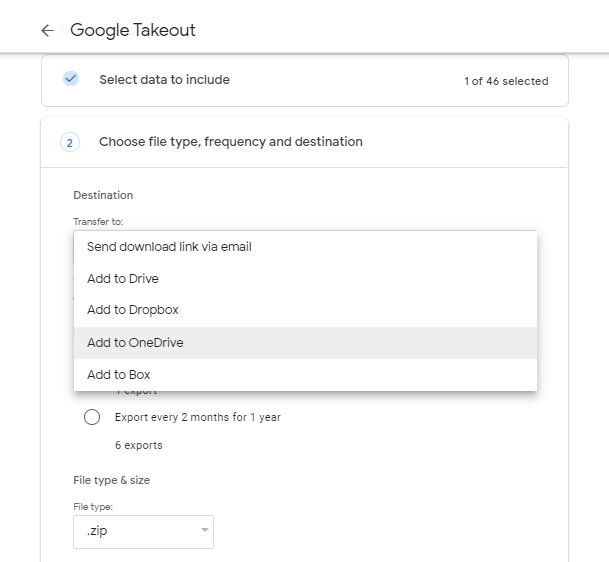
Step 4: In the destination, select the Add to OneDrive option.
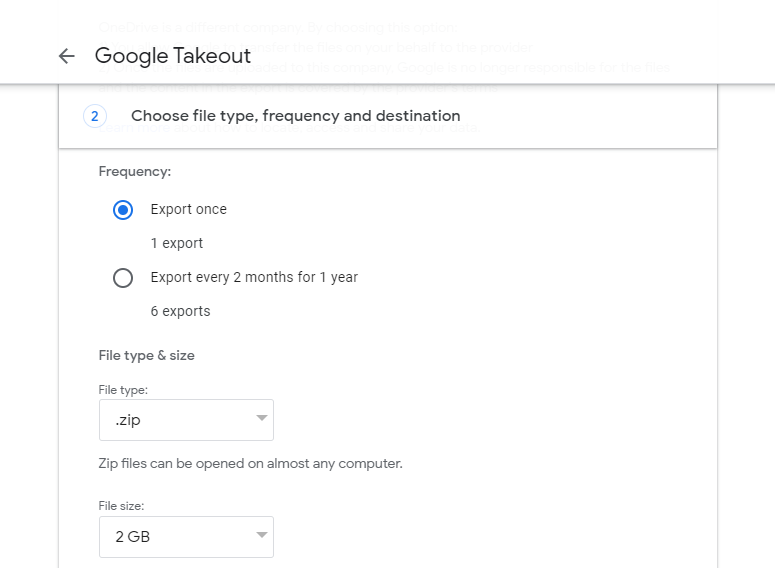
Step 5: Then, set the frequency, file type & size.
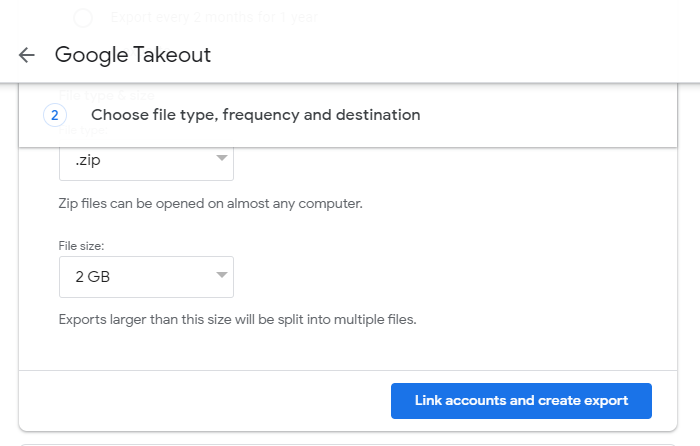
Step6: At last, tap the Link accounts and create export option.
#2: Migrate Google Drive to OneDrive using the Download and Upload trick
In this solution, we will use the Google Drive download option to move files from Google Drive to OneDrive. Follow the below steps to complete this migration task effectively.
Step 1: Log in to Google Drive with your account and password.

Step 2: Select the files you want to move to OneDrive.
Step3: Then right-click on it and tap the Download button.

Step 4: The files will be saved in your local drive.
Step 5: After that, log in to OneDrive and click on the ‘+ New’ button to create a new folder.

Step6: Go to the Newly created folder and tap the Upload option.

Step 7: Select the Files or Folder option and go to the location where you have downloaded data from Google Drive. Choose the files and folders to upload to the OneDrive.
Why is it challenging to use the manual approaches?
Users can face a lot of problems in moving from Google Drive to OneDrive using manual solutions. Read the below points to understand what kind of issues you can face with these tricks.
- Users can’t move their Google Docs, sheets, etc., with the help of these manual tricks; it only allows migrating videos, images, etc.
- These solutions take too much time to sync Google Drive to OneDrive data. Sometimes, users have to wait for days to complete the entire migration task.
- A good internet connection is also required from start to end for going through an easy migration task.
- With the help of these solutions, users can only transfer a single file or folder at a time.
To transfer Google Drive to OneDrive data, users can also choose an alternative method to do this task. The next section will share information on the best professional third-party tool to accomplish this task.
Transfer from Google Drive to Onedrive without downloading
A professional third-party tool like Shoviv Google Drive to OneDrive Migrator is the perfect solution that each user can choose to complete this migration task. The tool comes in handy to all users, even if you are processing this task for the first time. Users can easily Migrate Google Drive to OneDrive using this professional third-party tool. There will be no impact on the folder hierarchy and integrity of the data when exporting Google Drive data.
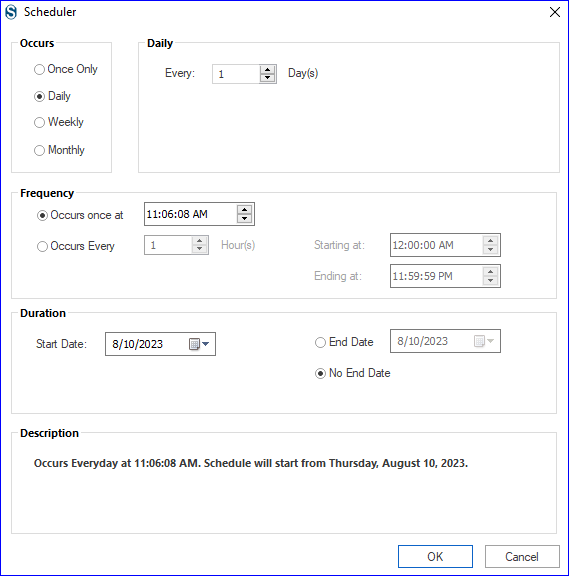
- For a timely and periodic migration, users can use its scheduler option.
- It allows users to transfer Google Drive to OneDrive, OneDrive to OneDrive, Google Drive to Google Drive, and Local Drive migration.
- Shoviv Cloud Drive Migrator also offers a facility to copy and paste the required data to the target.
- Moreover, it has a filter option to choose the desired items for this migration task. One can also remove unnecessary items from the migration using this option.
- Users can transfer large-sized data using this professional third-party software.
A quick procedure of moving from Google Drive to OneDrive
Users are not required to follow a lengthy procedure; a few simple steps can help users transfer Google Drive to OneDrive data:
- Step 1: Open the software and click Connect Drives.
- Step 2: Connect your Google Drive OneDrive accounts.
- Step3: Create Google Drive to OneDrive migration job.
- Step 4: Filter data per requirements.
- Step 5: Set the thread count and make other changes.
- Step6: Run the migration job to start the task.
Move Google Drive to OneDrive: detailed stepwise procedure
The following section will give you a detailed stepwise guide to transfer Google Drive to OneDrive cloud storage. So, follow each step carefully to process this Google Drive migration task.
Step 1: Launch the Shoviv Cloud Drive Migrator in your system.
Step 2: Go to the Create Drives and click the (+) button to create a new connection.
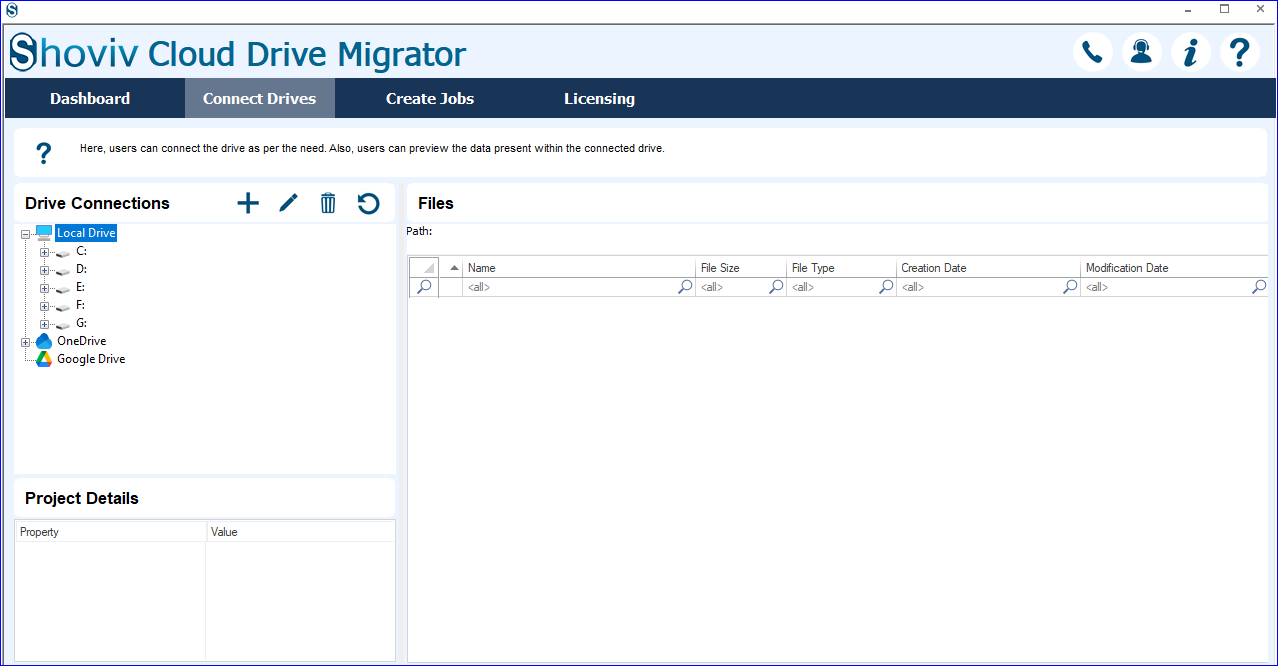
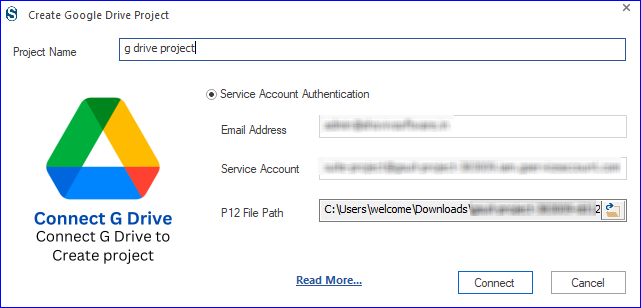
Step3: Then, enter the project name, email address, service account, and P12 file path. Click the Connect to continue.
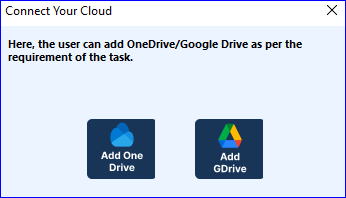
Step 4: Again click Create Drives and select OneDrive to create the target.
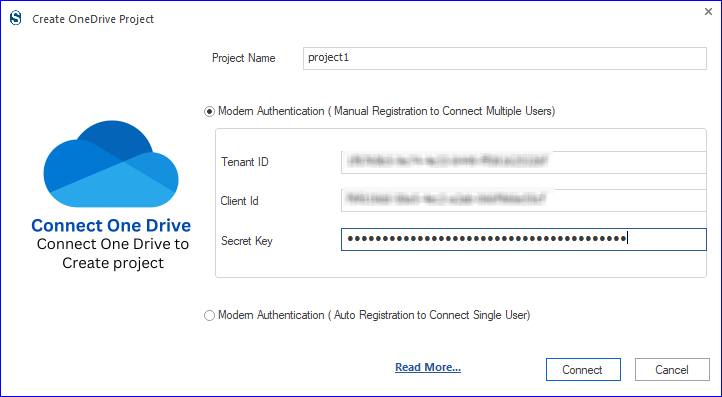
Step 5: Enter the project name, tenant ID, client ID, and Secret key. Tap the Connect.
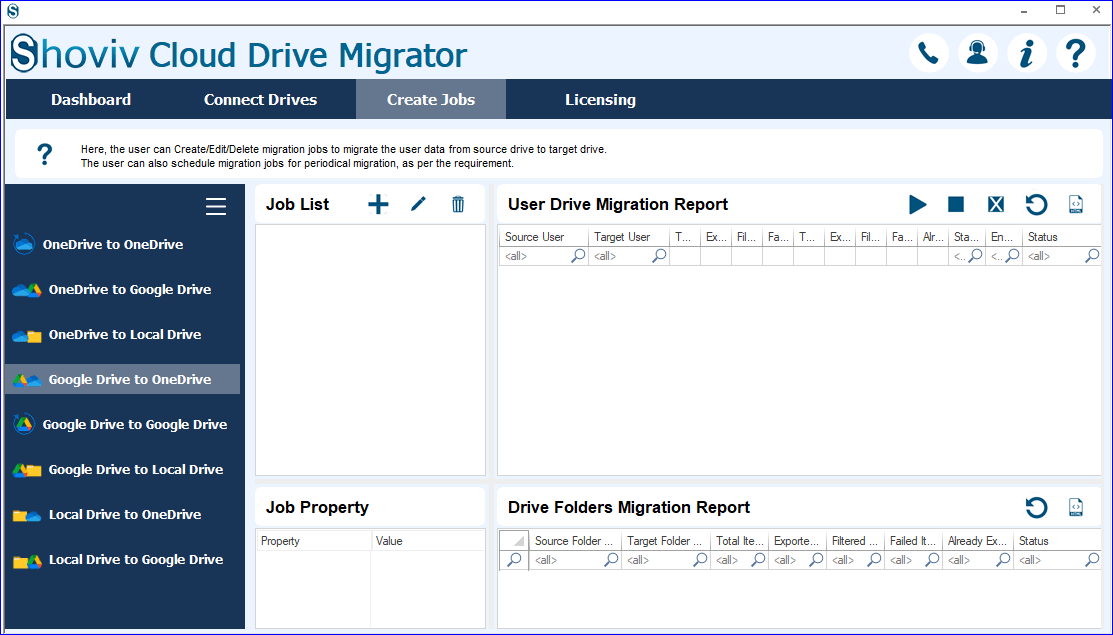
Step6: After that, move to the Create Jobs option and tap the (+) to create a new one.
Step 7: Enter the job name, select the Source and target projects. Then, click the Next button.
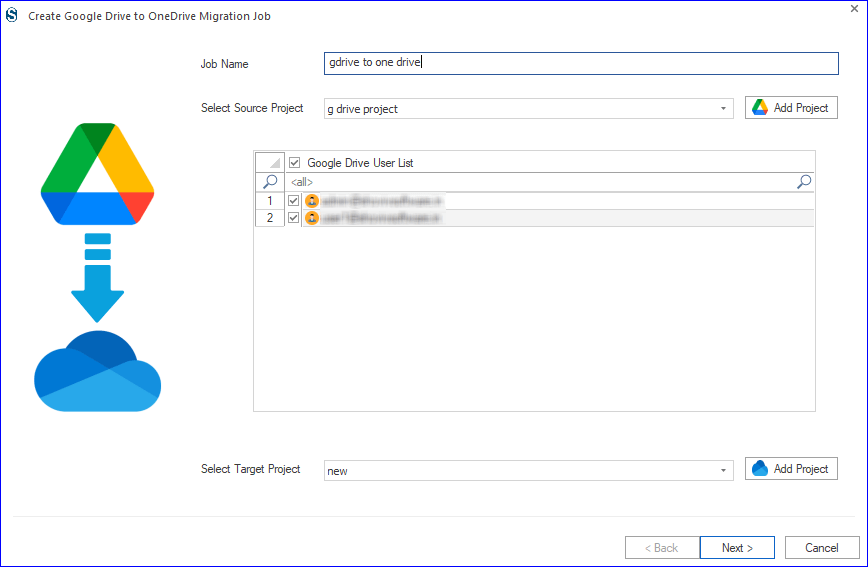
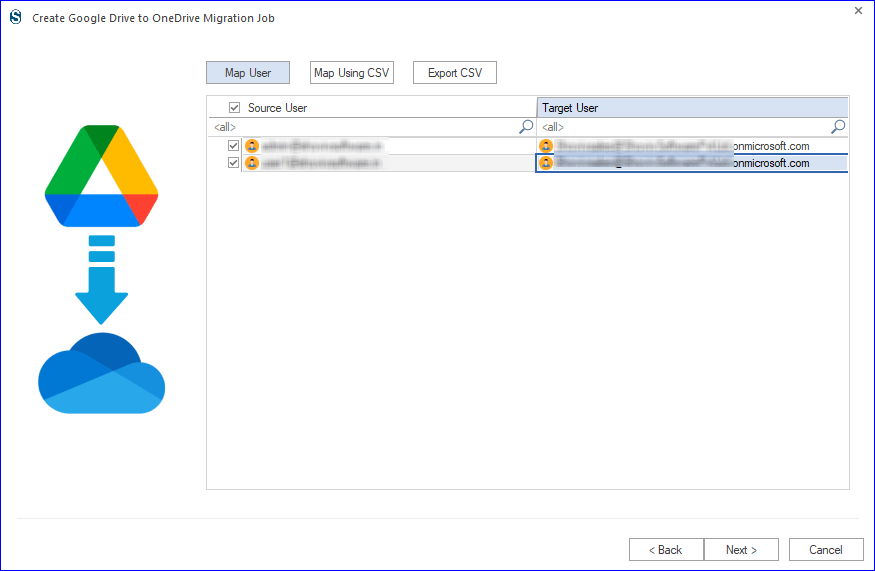
Step 8: Now, Map the Source user to the target and continue with the Next.
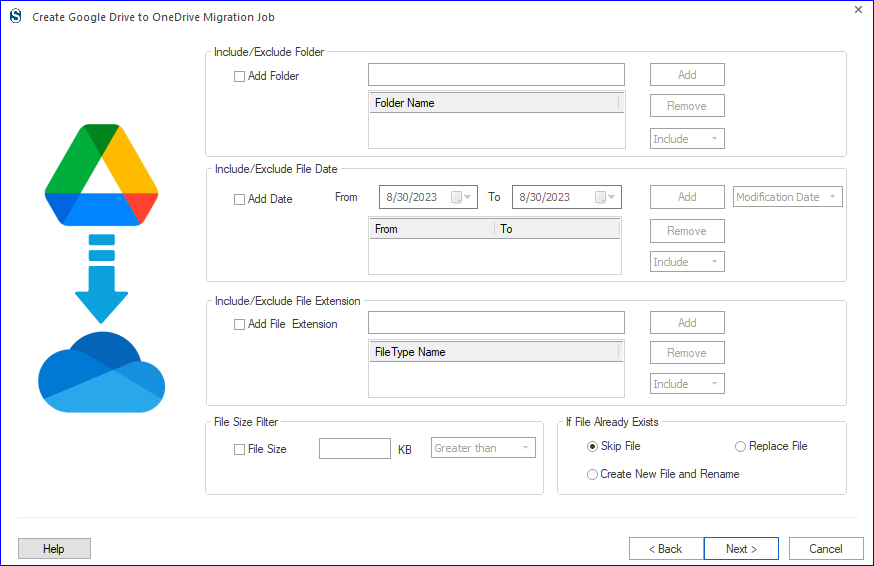
Step9: Filter items using date, folder, file extension, and size-wise criteria. Then, tap the Next.
Step 10: Set user and item thread count and user login attempts, and select the option in the Job action to schedule the migration task.
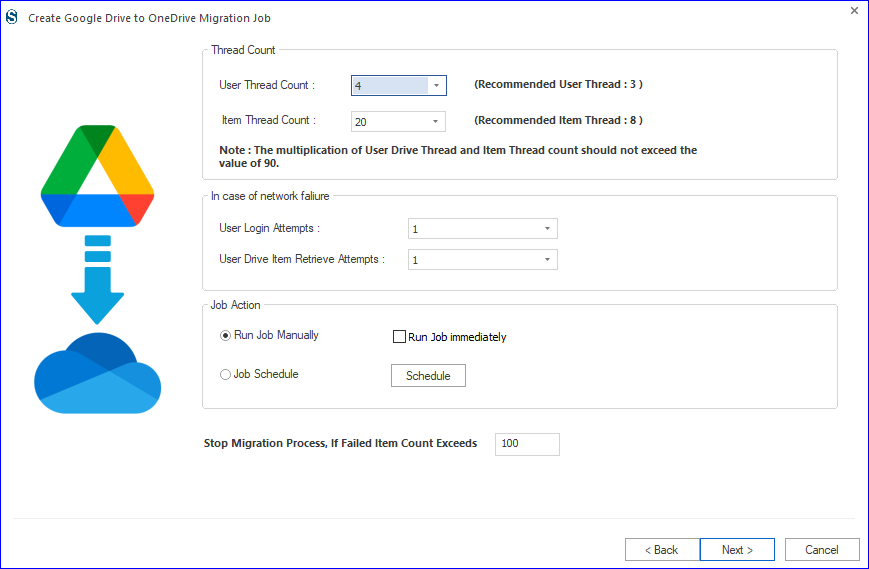
Step11: Users can schedule the migration job in a timely, like daily, weekly or monthly. After setting up everything, click OK and then Next.
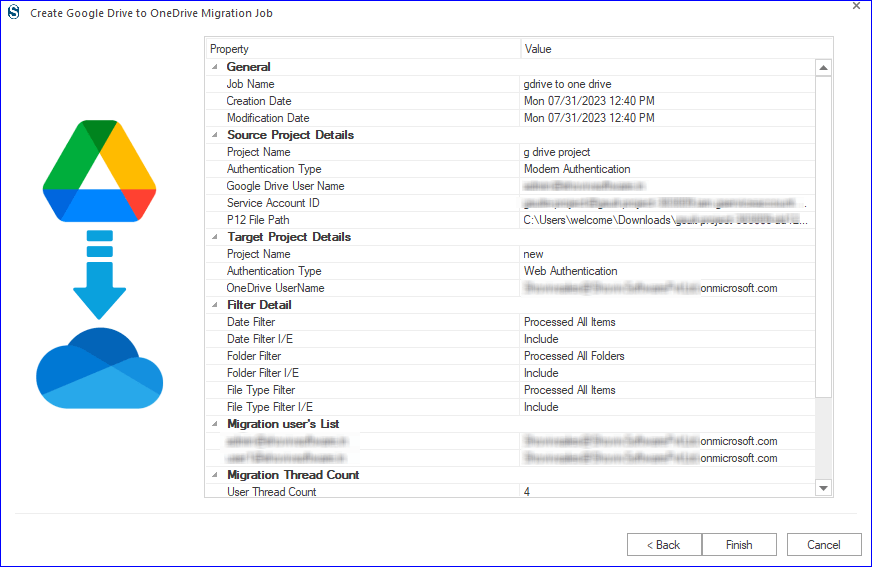
Step 12: Review the migration job settings and tap the Finish button. Run the Job whenever you want.
Also Read: How to Transfer files from OneDrive to Google Drive?
Final Words
With the discussion on how to transfer Google Drive to OneDrive data, we learned two ways to accomplish this task. Ultimately, we suggest users go with the Shoviv Cloud Drive Migrator to complete this task simply and quickly. Moreover, this software is capable of transferring from Google Drive, OneDrive, and Local Drive to the desired target. The tool also comes with a free demo version that users can use to check how it works. This free demo version allows users to process items less than 20 KB freely.
- How to Backup and Restore Emails in Webmail? - March 25, 2025
- How to Migrate Outlook to New Computer? - February 15, 2025
- Fix If Outlook Cannot Display the Specific Folder Location - February 1, 2025


