Ways to import OST to Office 365 are in search, and obvious reasons are behind it. OST (Offline Storage Table) is MS Outlook’s data storage file that allows users to make changes without an internet connection. On the other hand, Office 365 is a cloud-based software service offered by Microsoft, and it is a subscription-based service that comes with various plans.
This write-up will cover-up all the details related to importing OST to Outlook 365 and provide you with a solution for instant migration. Read the blog till the end to get your migration done.
Take the right Initiative to easily Migrate/Import your Outlook OST file directly into your Office 365
or Outlook 365 Account. Get Shoviv OST to Office 365 migrator easy-to-use software to make your
migration effortless.
What initiates users to import OST to Office 365?
Office 365, being a cloud-based software as a service, offers a lot of advancement to users. Here are some common advantages of Office 365:
- Office 365 provides great accessibility; anywhere can be accessed through an internet connection.
- There are no security concerns with Office 365, as Microsoft’s product comes with the utmost level of security.
- Comes with a subscription plan; hence no expenses on setup; users purchase a suitable plan as needed.
- It always remains updated hence no downtime with Office 365.
- Services like Skype for Business, Share Point, Hosted Exchange, Microsoft Outlook, et cetera are integral to Office 365.
Is there any manual way to import OST directly to Office 365?
To import OST to Office 365, there is no such direct manual method. If you go manually, firstly, you have to convert OST to PST file format and then import PST to Office 365. You must use a third-party solution to import OST to Office 365 directly and quickly. Let’s understand the manual method to import OST to Outlook 365:
Step 1: Convert the OST file to PST
- Open your Outlook account and make click on the File.
- Click on “Import and Export.”
- Choose the “Export to a file” option and click on Next.
- Select the PST option and click the “Next” button.
- Now select the emails or folders. Check the Include Subfolder >>Next.
- To save PST, browse the location.
- Check the “Replace duplicate with items imported” option and click Next.
- Use the password for PST files if needed.
- Click “Ok”.
Step 2: Upload PST to Office 365
- Login to Office 365 account >> Admin Center >>Exchange Admin Center Window will be appeared >>Permission >>Organization management>> + sign >>Mailbox Import Export>> Add>>Ok
- Then again, select Mailbox import-export >>Save
- Move to the Admin Center>>Setup>>Data Migration.
- Click on Upload File.
- Now click on the New Import Job>> Provide the job name and click Next.
- Go with Upload Your Date and click on Next.
- Now from the available Windows, select the Show Network Upload SAS URL.
- Copy the URL & paste it on the notepad >> Install and run Azure AzCopy and type there: AzCopy.exe./Source:\Network Path or File Location /Dest: “SAS URL”/V: location path where you want to save log file/AzCopy.log/Y.
- Now, press the enter key.
- Once the PST files are uploaded, create a CSV file to map the PST file into the mailbox account.
- Open Import Data Window and check both options and click on Next.
- Click the Select Mapping file>>Upload CSV file>> Validate>> Save.
- By this, the PST file will be uploaded into Office 365 mailboxes.
- Click the Close.
By following the above-given steps, you can upload OST to Office 365, but one should remember that the manual method has some limitations too.
What limitations manuals way has?
To Import OST to Office 365 quickly and proficiently, the manual method doesn’t provide a suitable way. The manual way has various drawbacks, some of which are:
- It is lengthy and time-consuming, not a direct way.
- Prior technical knowledge is a must to execute the task.
- Chances of human error; a minor mistake can ruin the process.
- You have to process every OST file one by one; hence it is very time-consuming; not suitable for beginners.
- No advanced option for a professional import is available.
Professional way: Third-party tool
Professionals don’t prefer a manual way to import OST to Outlook 365 because no one wants to risk the data, and nobody has time to execute the same steps repetitively. To provide an effortless solution to users, Shoviv Software has developed an astounding tool for professionals that offers smooth processing with multi-functioning.
Recommended solution: Shoviv Outlook OST to Office 365 Migrator
Have a look at its highlighted features and explore its work.
- You can add as many PST files as you want to and import them to Office 365; import multiple OST files in one go.
- It scans the OST files and repairs and imports OST files after the recovery.
- The software is also capable of converting OST files to PST file format.
- It also facilitates importing OST files to Live Exchange Server.
- You can also save your data into HTML, EML, vCal, vCard, MSG, et cetera file formats.
- Shoviv OST to Office 365 Migration Tool supports all MS Outlook and Windows OS versions.
How to migrate OST to Office 365 using Shoviv Software?
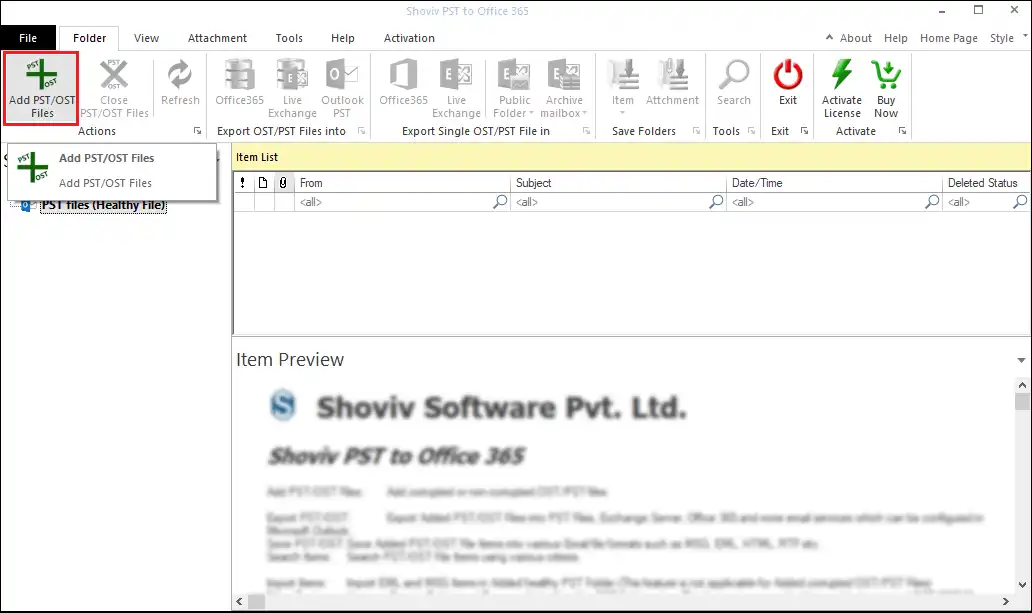
- Firstly, install and open the Shoviv OST to Office 365 Migration Tool.
- Now, click the Add PST/OST files button present on the ribbon bar to add the .ost files.
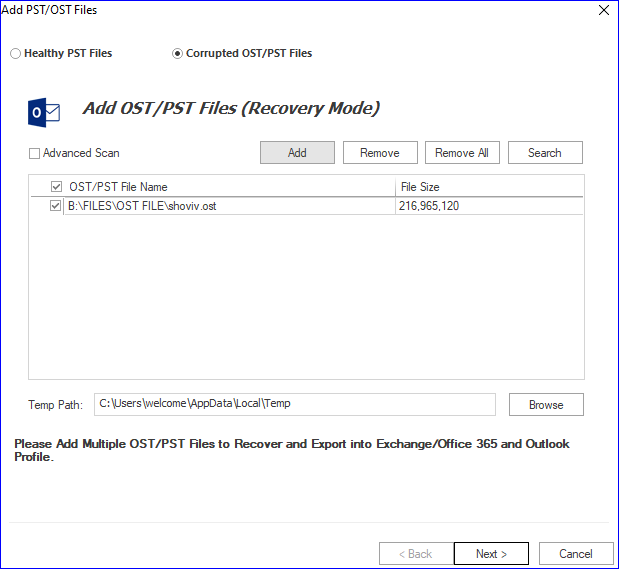
- A wizard will open that asks you to select the source type and add it accordingly. Click on the Next.
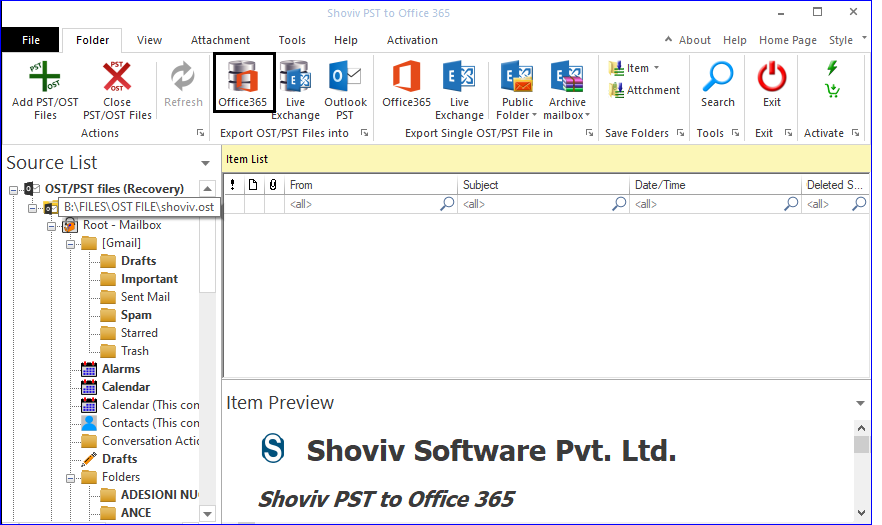
- Users can see the added OST files’ data in the source list. Now, select the Office 365 option from the ribbon bar or select the Office 365 mailboxes option by clicking right.
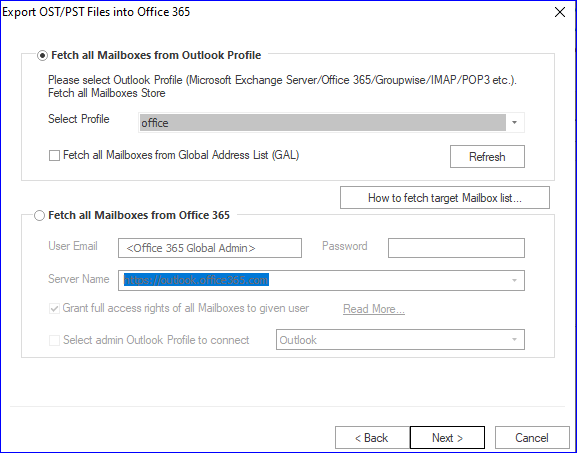
- Now, use the Fetch All Mailboxes from Outlook Profile option to connect Office 365 and fetch mailboxes.
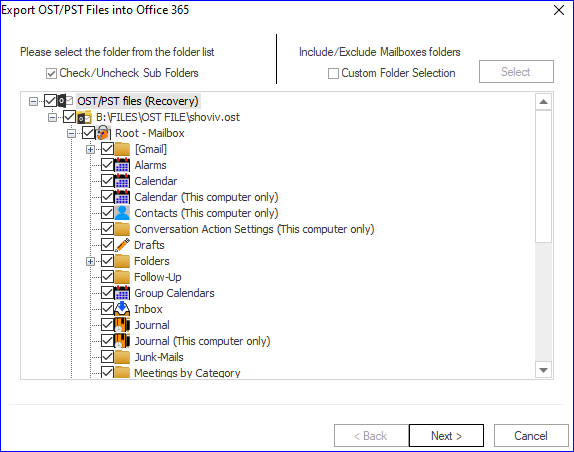
- You will be asked to check/uncheck subfolders as per the requirements of the subfolders. Click on the Next.
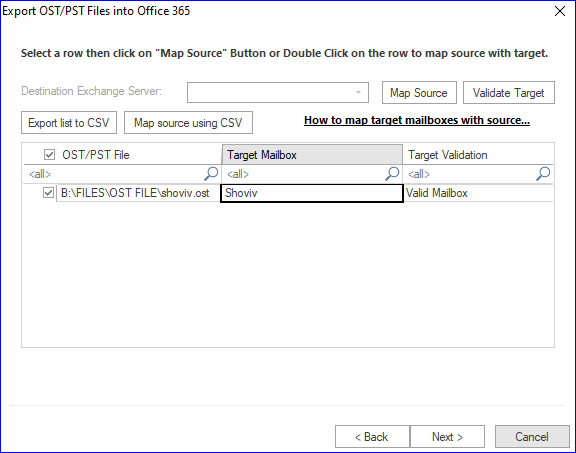
- In this wizard, you can map the mailbox and validate the target. After mapping PST’s mailbox with the Office 365 mailbox, validate the target and click on Next.
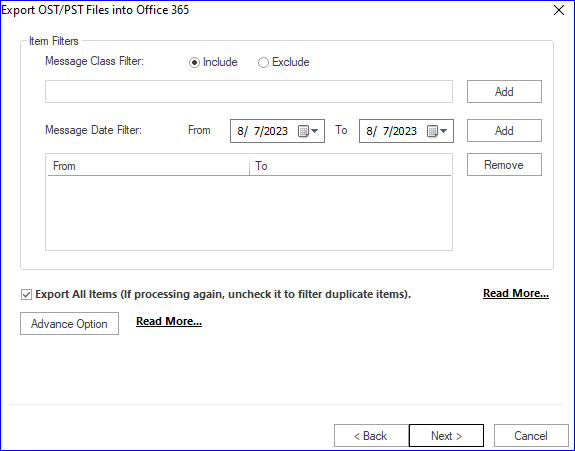
- Now, you will be prompted to the filter page. Here, you can apply a filter based on the message class and the message date range. Click on the Next.
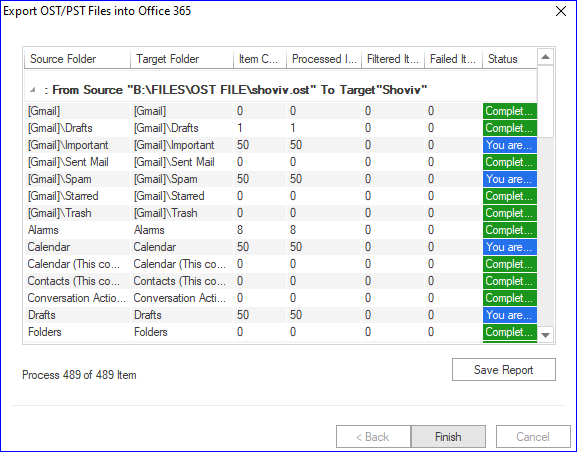
- The process to import OST to Outlook 365 will be started by clicking on Next. After completion of the process, a pop-up with the message “Process completed successfully” will be shown. You will also get a complete process report and save the status report for future reference. Finally, click on the Finish.
Final Words:
Users have different reasons and ways to import OST to Outlook 365. The manual way and professional way are two ways in which the manual way comes free but not free from drawbacks and limitations. In contrast, a professional third-party tool Shoviv OST to Office 365 Migration Tool, provides an expert way with advanced features.
Users can check the software’s working by downloading the free demo version of the Shoviv Software. The free trial version allows importing the first 50 items per folder; check and proceed for the license.

- Resolved Error 0x80070021 in Outlook - March 11, 2022
- 7 Reasons to choose a new approach for Microsoft 365 Migration - September 3, 2021
- How to Backup Emails from Outlook? – An Easy Solution - July 20, 2021