Do you want to know the procedure of importing MBOX to GoDaddy webmail? This process might seem daunting at first. But with a proper stepwise guide, you can import MBOX to GoDaddy webmail in a straightforward manner.
MBOX is a broadly used file format supported by a lot of mail clients, including Thunderbird, Apple Mail, Eudora, etc. It stores a large number of emails in a single file. On the other side, GoDaddy Webmail is a reliable email service that offers extraordinary features for both personal and business communication.
When users import MBOX files to GoDaddy Webmail, it will help them keep all essential data easily accessible from one location. However, GoDaddy doesn’t support direct MBOX imports, so we need to use alternate ways to import emails to the GoDaddy account. This blog will break down all solutions in easy steps to guide users in simplifying the MBOX emails to GoDaddy webmail migration.
What are the practices for MBOX to GoDaddy account import?
Users can cover this importing task with the help of manual and professional approaches. The following section will share the best manual practice to import MBOX to GoDaddy webmail. Then, we will cover professional software to speed up and efficiently finish the MBOX to GoDaddy webmail migration.
Let’s now go over the manual way to complete the MBOX file import task.
How do you import an MBOX file to GoDaddy with manual effort?
To import MBOX emails to a GoDaddy webmail account, users ought to download the Firefox Thunderbird mail client in their system. This practice might seem tricky as it is not a direct approach to moving emails from the MBOX file.
To perform this importing task manually, users need to deploy it in two parts. Firstly, we will configure the GoDaddy account on Thunderbird. Then, we will import the MBOX file to the GoDaddy account.
Part 1: Setting up a GoDaddy account on Thunderbird
- Install and open the Thunderbird application in your system after downloading it.
- Enter your account details to configure your GoDaddy account and choose the manual configuration.
- Then, fill up the information below:
- Incoming server: mail.secureserver.net
- Incoming port: 993
- Outgoing server: smtpout.secureserver.net
- Outgoing port: 465
- After that, tap the Finish button, and your GoDaddy account will be set up on Thunderbird.
Part 2: Importing MBOX to GoDaddy webmail account
- Open the Mozilla Thunderbird application.
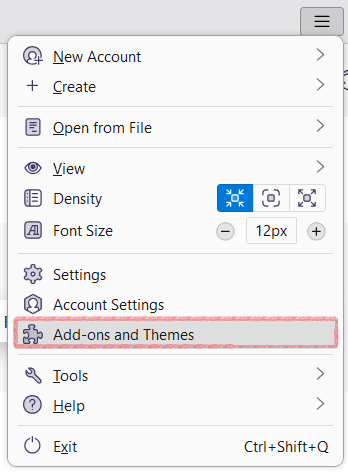
- Then, navigate to its menu bar and select the Add-ons and Themes option.
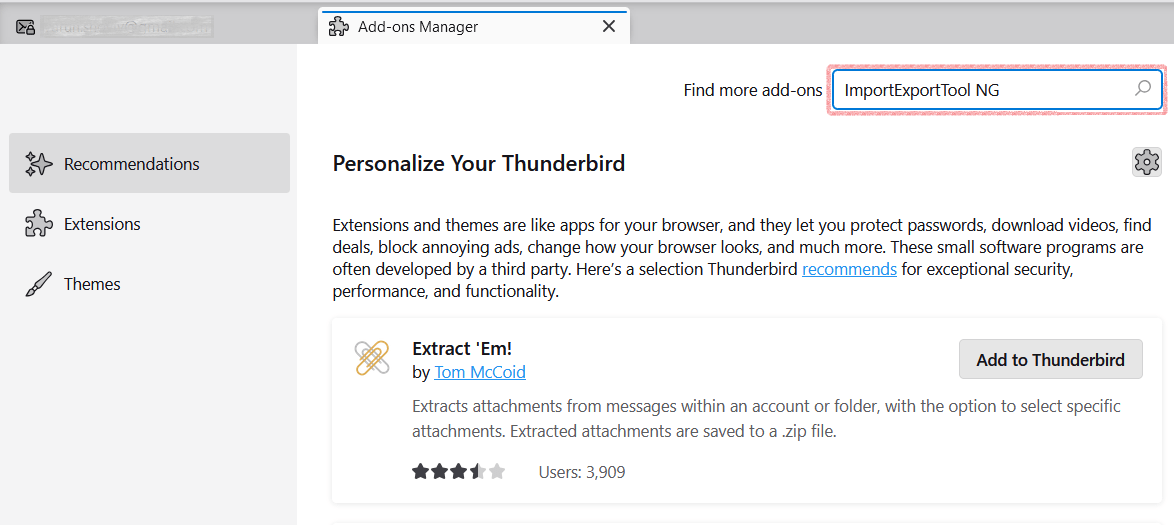
- Type ImportExportTool NG in the search bar and press the Enter key.
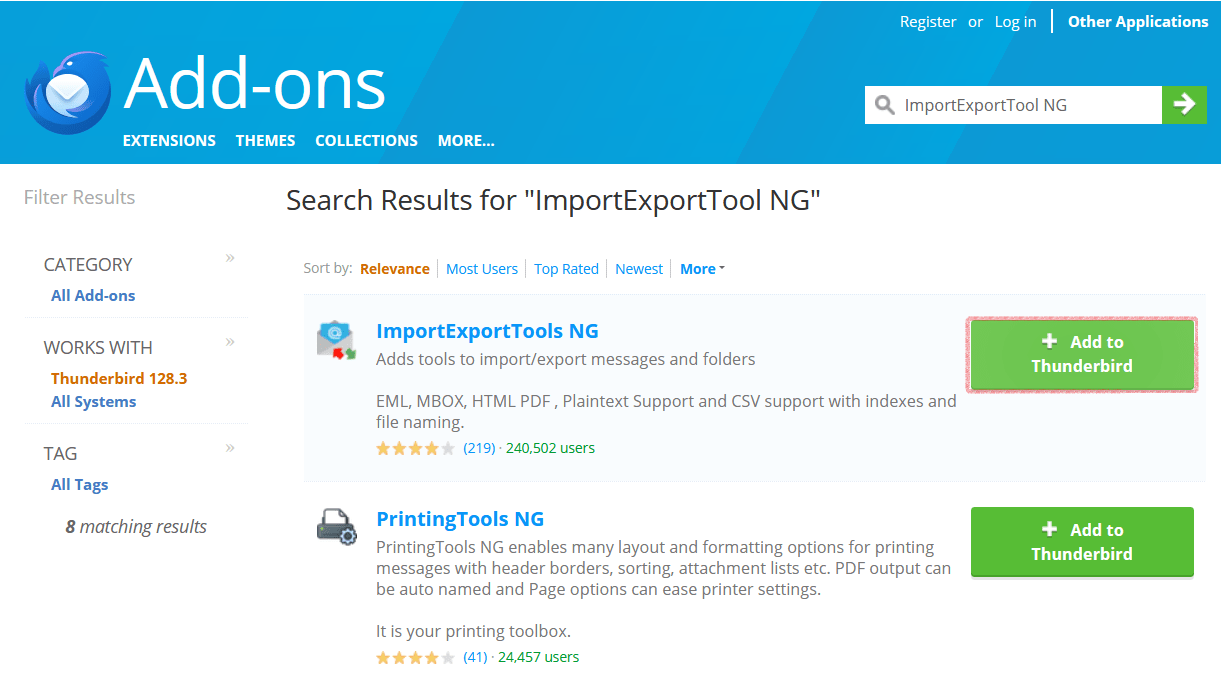
- In the search result, look for ImportExportTool NG and click the + Add to Thunderbird button.
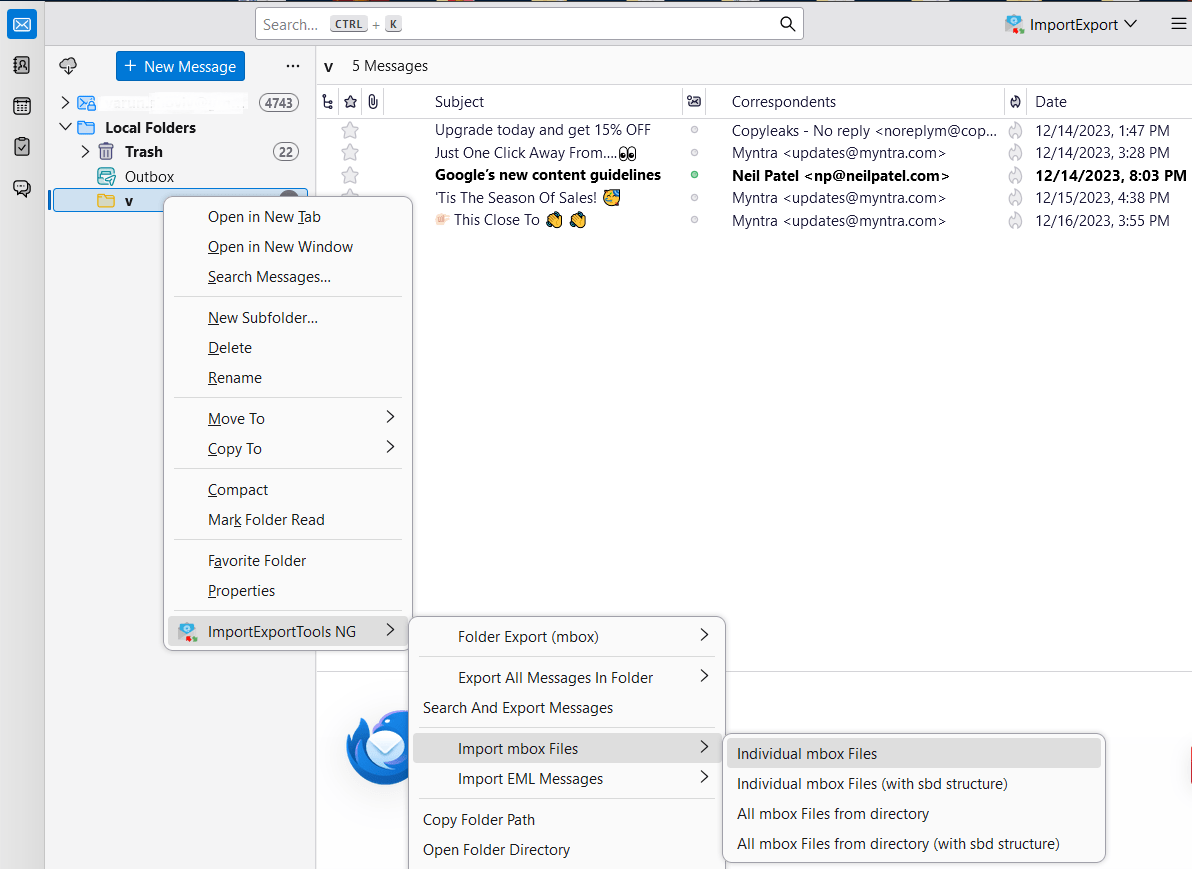
- After that, right-click on the folder where you want to import the MBOX file. Then, follow ImportExportTool NG > Import MBOX files, and select the option to import individual files or all MBOX files from a directory. (Here, we are importing individual MBOX files as an example.)
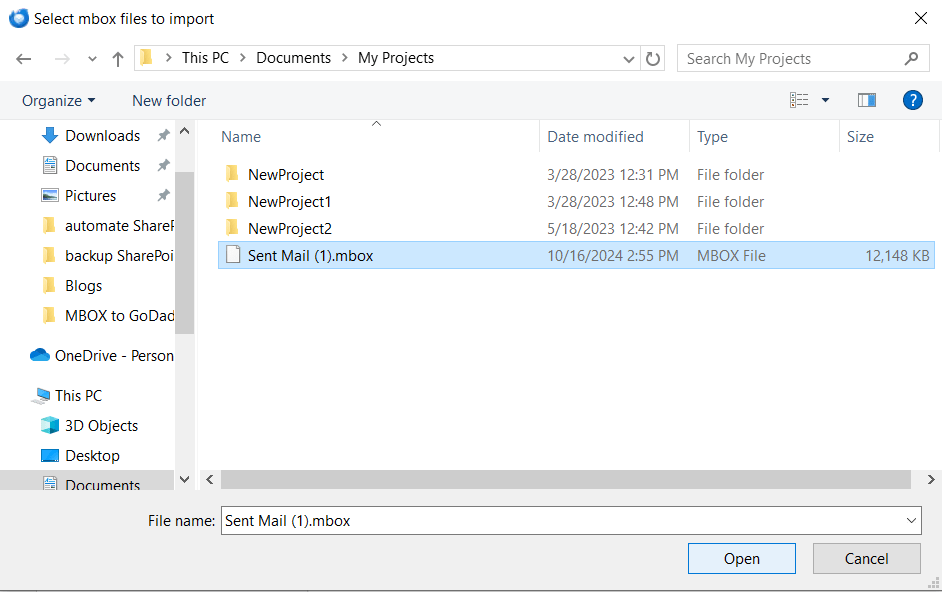
- Choose the location where your MBOX file is saved and select it to import into the GoDaddy account.
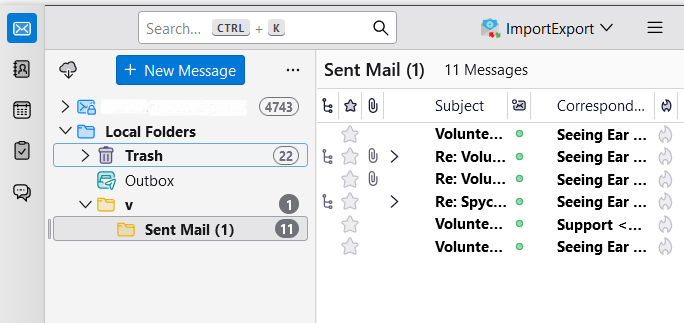
- Open Thunderbird and verify the folder where you imported MBOX to check all emails are successfully imported.
Adhering to these steps will help users to easily import MBOX to GoDaddy webmail accounts effectively. However, this solution is only efficient in moving lower-size MBOX files and can disrupt data if it processes large-sized files. Moreover, it doesn’t maintain the emails’ folder hierarchy and meta properties.
The manual solution comes for free, but not perfect if you want to import too many large-sized files. So, implement trustworthy automation, like the Shoviv IMAP Backup and Restore Tool.
An expert tool to import MBOX files to GoDaddy Webmail
Users need reliable and robust software for a secure and effortless migration of MBOX emails to a GoDaddy account. So, they can rely on the Shoviv IMAP Backup and Restore Tool for this. It offers a variety of facilities to overcome the issues during the MBOX file importing task. Moreover, even new users do not need technical skills to import emails to GoDaddy webmail accounts using this professional software. It also allows users to backup their IMAP emails into various file formats, like PST, MBOX, EML, MSG, etc.
This software keeps the folder hierarchy and integrity of the emails when importing MBOX files into the target. It offers a filter option that users can use to add or remove desired items before processing. Users can also set up backup or restore jobs on a regular basis through its scheduler option. It works effortlessly for all IMAP-supported email clients, like GoDaddy, Gmail, Outlook, etc. In addition, it prevents the data against duplicate items when moving emails from the MBOX files.
Steps to import MBOX to GoDaddy Webmail
- Install and open the Shoviv IMAP Backup and Restore Tool.
- Browse the location where MBOX files are stored and create a backup directory.
- Click the Restore Jobs, and select the Export MBOX files with the folder hierarchy option.
- Enter the server name and port value, map the source with the target and tap Next.
- Apply filters, modify settings if needed and click the Next button.
- Review the MBOX import task settings and hit Finish to import emails to GoDaddy webmail.
Final Remarks
MBOX file stores a lot of data that is essential for organizations. So, applying a simple and secure approach to import MBOX to GoDaddy webmail accounts is crucial for users. Moreover, we are also aware that the manual solutions do not provide the results as expected. Hence, proceeding with this task using the Shoviv IMAP Backup and Restore Tool will be an excellent option for users.
Also, users can try its free beta version to know the efficiency of the software and get a practical understanding of its functions. Its free version is capable of processing the first 50 items from each folder to the destination.
Popular Articles
- How to Export Calendar from Outlook on Microsoft 365? - April 15, 2025
- Understanding Yahoo Mail Storage Limit & Back-Up Process! - April 10, 2025
- Mailspring vs Thunderbird: The Ultimate 2025 Showdown - April 3, 2025


