When we talk about new changes in technology, we also question whether it is good for us or not. We know that “SquirrelMail” is a lightweight web-based email client written in PHP that is known for its simplicity and compatibility with various platforms. “Office 365 “, now known as “Microsoft 365”, is a comprehensive suite of productivity tools offered by Microsoft. It includes a range of applications such as Outlook for email, SharePoint for document management, Microsoft Teams for collaboration, and many others. So, in the following guide, we’ll explore the steps to migrate SquirrelMail to Office 365.
The reason behind moving SquirrelMail to Office 365:
- Utilizing a cloud-based platform allows users to work with their data seamlessly without worrying about the intricacies involved.
- Provides a wide range of collaboration tools, including SharePoint, Teams, Skype for Business, etc.
- Office 365 adheres to industry compliance standards and regulations, legal compliance, and ensuring data protection.
- Offers a user-friendly interface and seamless integration with other Microsoft services.
- Allows access to files, emails, and applications from any device with an internet connection.
- Scale with the needs of an organization, accommodating growth and changes in user requirements.
- It comes with enhanced security features such as multi-factor authentication and encryption.
- Office 365 receives regular updates and support from Microsoft, and there is no downtime.
- Its subscription plans are suitable for all end users, from individual to Enterprise level.
So, these were some common reasons to migrate SquirrelMail to Office 365, however, it varies user to user.
What are the available ways of migrating SquirrelMail to Office 365?
Recognizing the challenges users face in forwarding emails from SquirrelMail to Office 365, we’ve delved into the realm of migration solutions. We’ve revealed two approaches: the manual method and the third-party tool approach, also termed the professional method.
Manual Method-
- Firstly, access your SquirrelMail account on your personal computer.
- Go to Options, then click on Account Setting.
- Pick out the emails you want to hold onto.
- Save them to your computer by clicking Archive.
- A file is created and stored in your downloads.
- After everything’s finished, you’ll find the data in Maildir.
- Now, you have to import data to Office 365, and there is no direct way to do so.
So, here we can see that the manual approach doesn’t provide a complete solution to migrate SquirrelMail to Office 365. It leaves the user in midway. So, professionals don’t want to go with a manual approach and search for a professional way to execute this migration task proficiently and seamlessly.
Professional Method:
Introducing our groundbreaking Shoviv IMAP to Office 365 Migration Tool, designed to seamlessly transfer emails with unparalleled ease. It not only streamlines the migration process, but it also opens up a world of possibilities beyond. Have a look at its highlighted features:
- Migrate data from various email platforms with IMAP support, such as Gmail, Yahoo, iCloud, Zoho, and others, to Office 365.
- Employing a job-oriented approach streamlines the migration process. It enables users to effortlessly handle multiple mailbox transfers concurrently, enhancing operational agility.
- You can filter data by selecting the date range and specific folders.
- Users can migrate IMAP mailbox to Office without constraints on size or number, effortlessly utilizing any email client.
- Within this tool, there exists a classy feature named “incremental export,” enabling users to seamlessly resume the process from their last stoppage.
- In addition to facilitating the transition to Office 365, this tool also supports migration to Exchange Server(On-Premises).
- With its user-friendly GUI, you can operate the migration without needing any technical expertise.
- Safeguarding the integrity of your data effortlessly, this advanced tool ensures a seamless migration to Office 365.
- It is compatible with all Windows OS and allows you to give it a try before committing to a purchase.
Professionally migrate SquirrelMail to Office 365 by following these steps:
Migration to Office 365 can enhance productivity and user satisfaction. By following these steps diligently, you can streamline your email infrastructure and empower your team with the robust capabilities of Office 365.
- Install the Shoviv IMAP to Office 365 Migration tool and open it.
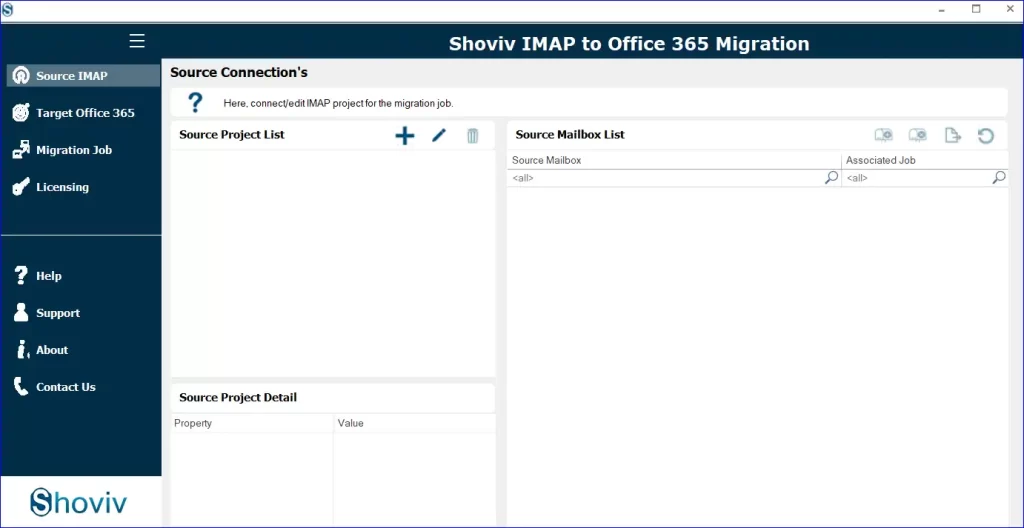
- To start, opt for the Source IMAP tab, then proceed by selecting the add button. Must give a project name, enter the specified credentials, and confirm by clicking
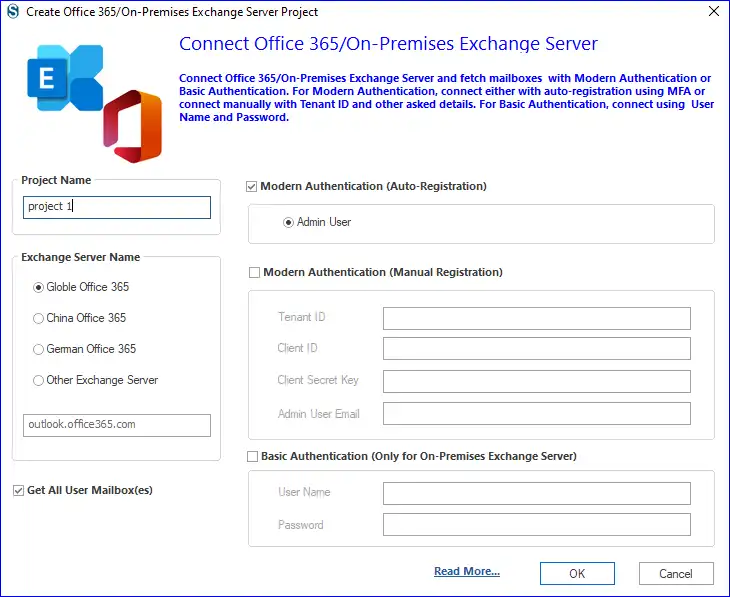
- Access the Target Office 365 tab to set up a connection with Office 365.
- Kindly authorize using Modern Authentication (Auto-Registration). Select OK upon confirming your credentials.
- Create a migration job, and for this, click the Migration Job tab to migrate SquirrelMail to Office 365.
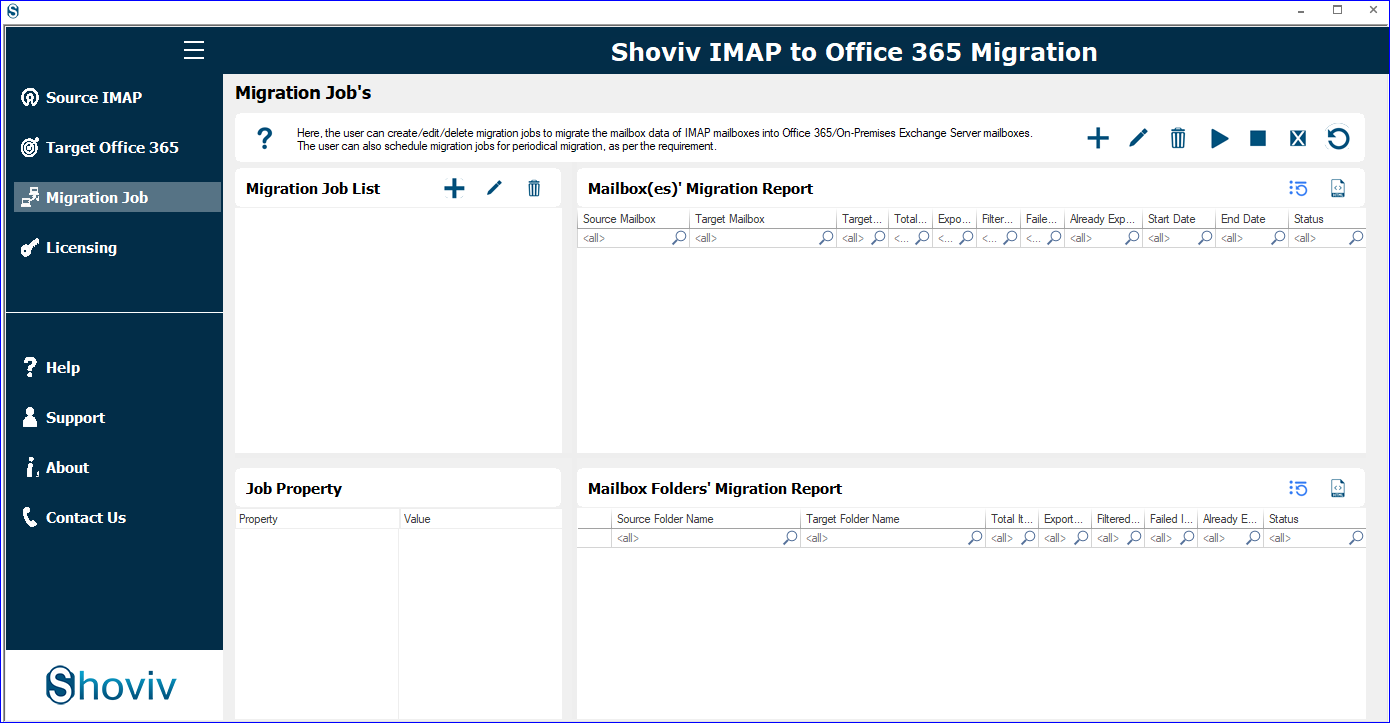
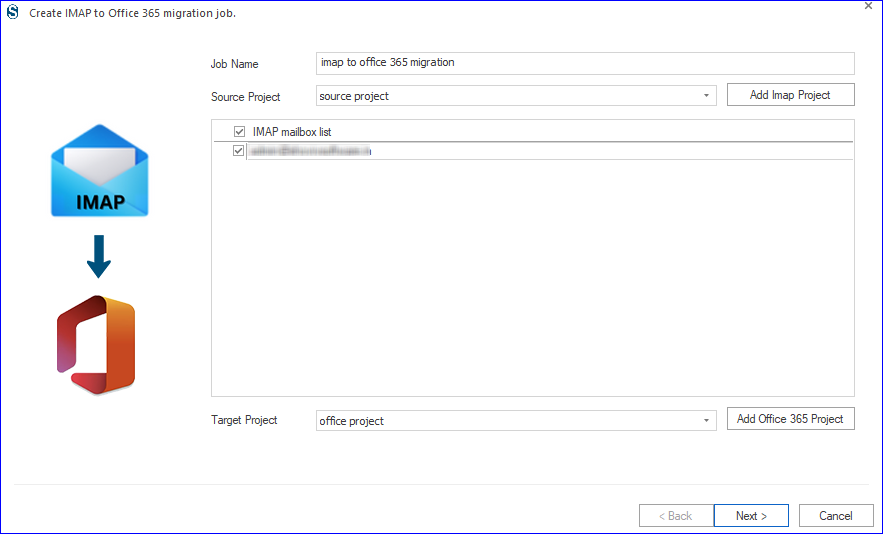
- Continue by giving a job name, adding IMAP and Office 365 projects, examining mailboxes, and clicking on the Next.
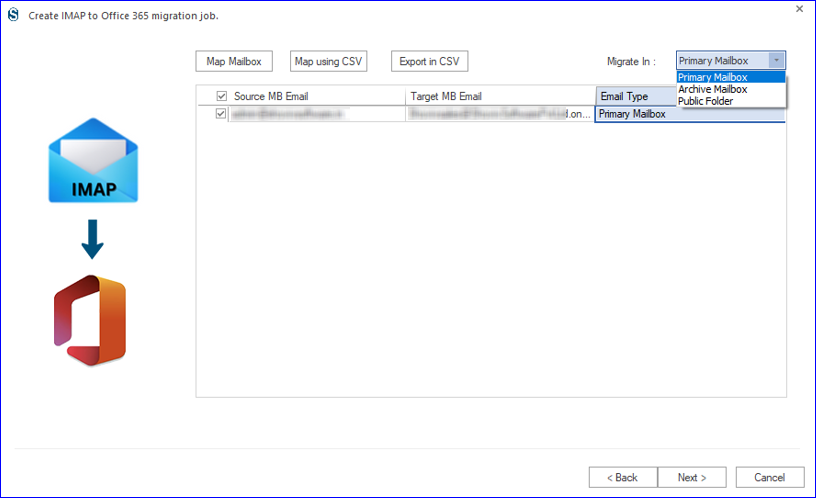
- Decide on whether it’s the Primary, Archive, or Public Folder. Then, move forward by clicking Next.
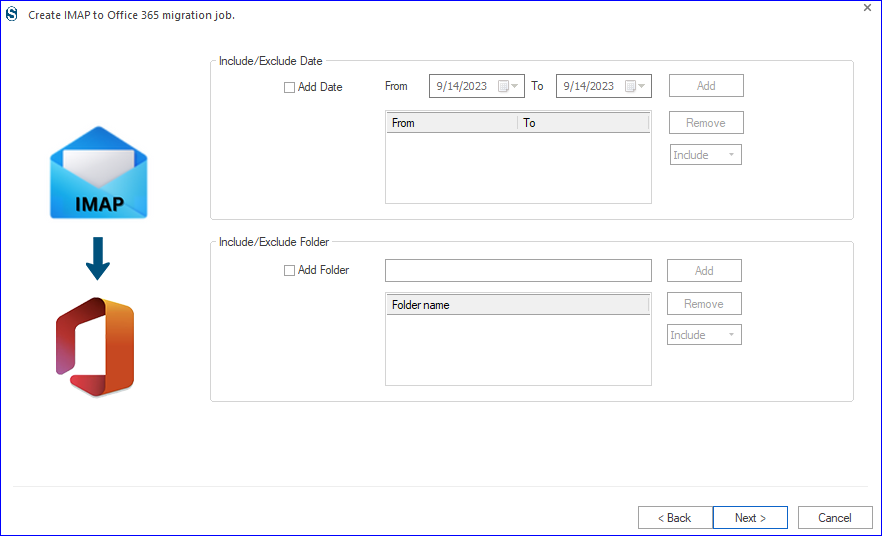
- Filter the email data based on the folder and date specification. After applying these criteria, proceed to the next step.
- Please adjust the setting according to the requirements for the task.
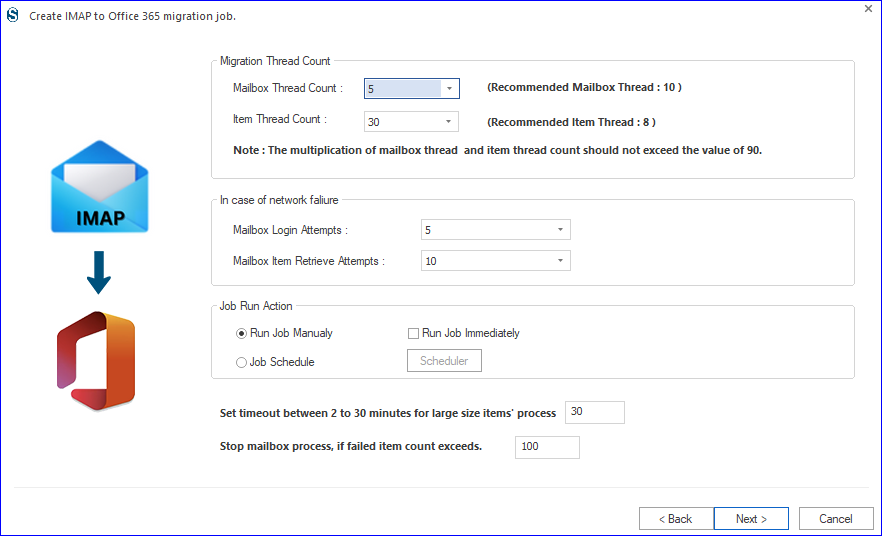
- You will see options for Job Run Action: Schedule or Run the Job Immediately/ Manually. If you opt for scheduling then customize your migration plan by specifying occurrence, frequency, and duration criteria for scheduling.
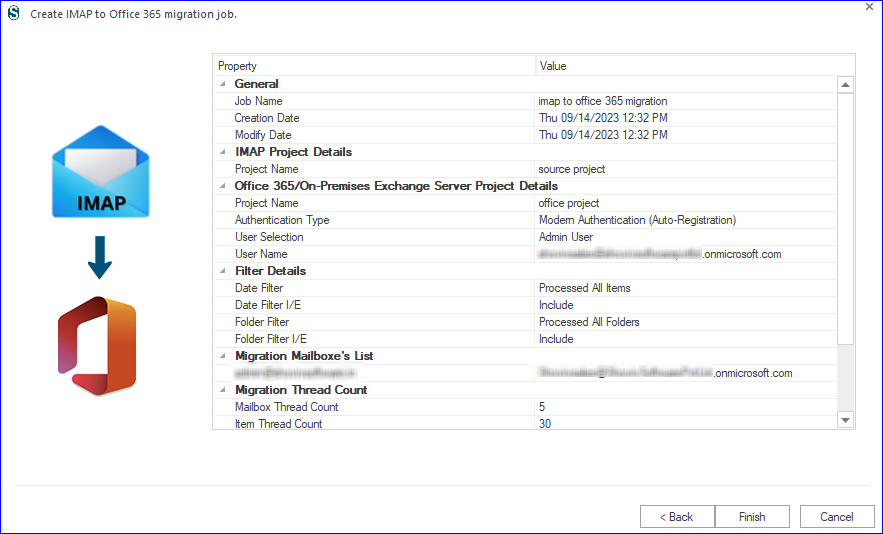
- If everything looks good with the setting, give them a final check and then press Finish to start the migration job.
Winding Up:
The decision to migrate SquirrelMail to Office 365 depends on the end users, and various reasons are there for this. To professionally handle this task, users need a tested and verified tool like Shoviv’s. Users can try out the Shoviv IMAP to Office 365 Migration Tool for free by downloading its demo version. This allows them to explore the software without any cost and facilitates migration of the first fifty items per folder. Once you are satisfied with working, you can go for the licensed version with no limitations. Users also get free technical support with Shoviv IMAP to Office 365 migration utility.
- Mailspring vs Thunderbird: The Ultimate 2025 Showdown - April 3, 2025
- Why is My Outlook Offline? Quick Fixes to Get Back Online - March 26, 2025
- Why Microsoft Outlook Keeps Asking for Password & How Do I Fix It? - March 18, 2025


