We are all well versed with Google’s flagship product, Gmail, and aware of how it serves better integration than others. A tilt of users from all the email providers to Gmail can be seen, and Comcast email users are no exception. Comcast or Xfinity users continuously search on the internet for a way to migrate Comcast email to Gmail. This write-up is dedicated to this topic, covering all the dimensions of this email migration task and tool. Be with the blog and complete your Comcast email migration efficiently.
Let’s Know Why There Is a Tilt from Comcast Email to Gmail:
- Gmail is a product of Google, and its brand image and visible expansion are common reasons.
- With a Gmail account, users also get multiple services/products like Google Drive, Spreadsheet, Meet, Chat, Calendar, Docs, Forms, and other Google Services.
- For large organizations, Google provides scalability by switching to Google Workspace. Moreover, integration/login with third-party apps/websites is easier with a Gmail account than with any random one.
- Comcast is more focused on its primary business which is cable, broadband, and entertainment while Google in Gmail making continuous advancements and these advancements are eye-catchers.
- Comcast users who have left their services now want a trusted and scalable platform.
Ways to Migrate Emails from Comcast to Gmail:
To be straight, there is no satisfactory direct method to migrate Comcast email to a Gmail account. The best you can do for free is forwarding upcoming emails. Let’s know how to move emails from Comcast to Gmail.
Settings in Comcast Email Account to Transfer Emails:
- Login to your Comcast/Xfinity email using the credentials.
- Find the Settings icon on the settings page and move ahead to the Email Settings.
- At the left pane, from the Mail section, select Auto Forward.
- Enable mail forwarding from here.
- Now, enter the email credentials of the Gmail account in which you want to forward emails.
Settings in Gmail Account to Add Email Account for forwarding:
- Login to Gmail>>Settings>>See All Settings.
- Next, go with the “Accounts and Import”>> “Import Mail and Contacts”.
- Enter your Comcast email address and continue.
- Sign in to your Comcast account and complete the authentication.
- After enabling emailing and contact option, tap on the “Start Import” button.
What Makes Shoviv IMAP Migration Tool the Professionals’ First Choice?
Shoviv IMAP to IMAP Migration Tool is an advanced utility that migrates emails from one IMAP account to another. Let’s have an eye on the prominent features of this tool:
- Users can migrate multiple mailboxes without any limitation on the size.
- It is a job-based utility that enables users to run multiple jobs simultaneously. Users can add multiple mailboxes to a job, hence saving a lot of time.
- Users can filter emails based on the date range and folder criteria.
- It also facilitates scheduling the email migration after creating a job.
- Moreover, users can have a free trial of the software. The free version allows migration of the first fifty items per folder; no limitations with the licensed version.
- Users also get a free lifetime technical support facility with the software license. However, the software comes with a very simple interface; still, if technical support is required, then users can contact the support team 24*7.
See How Simple It Is to Migrate Email to Gmail with Shoviv Software:
- Simply install and launch the Shoviv IMAP to IMAP Migration Tool.
- Now, create a connection with the source (Comcast), by clicking on the Source Connection tab.
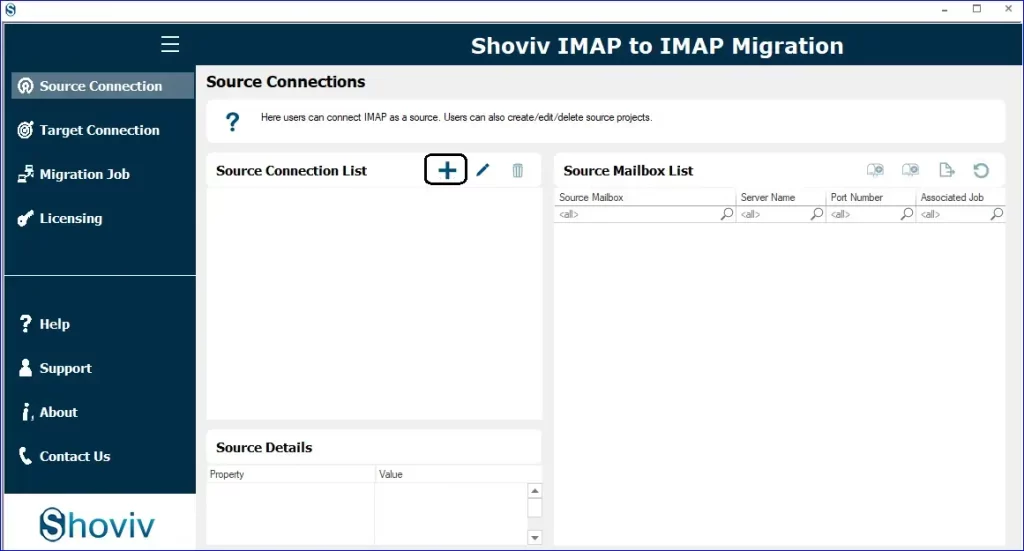
- Enter the Project Name and then click on the Add. Enter the Server Address, Port Number, Email address, and Password. Some email clients also require an App Password (if needed then create and enter). Click on the OK.
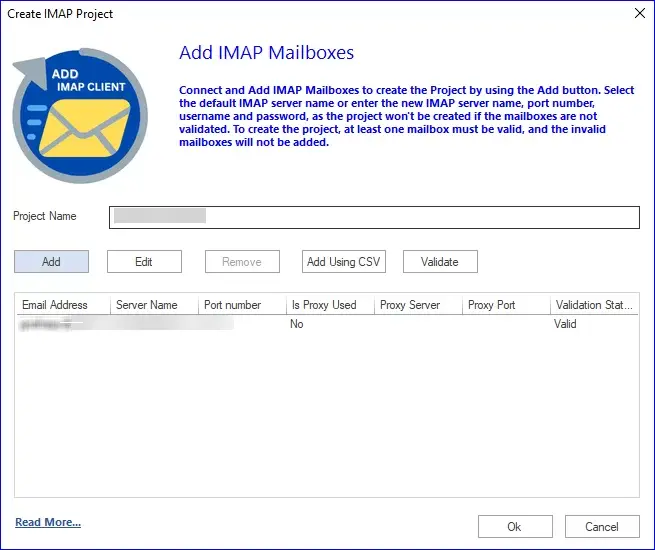
- In the same way, create a connection with the Target (Gmail). Click on the Target Connection and enter the asked details as you entered in connecting the source.
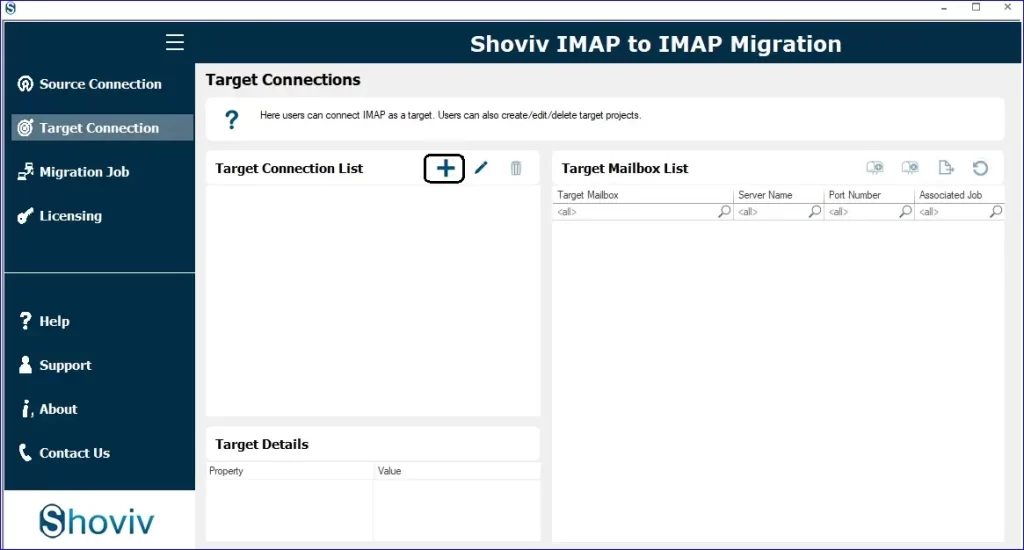
- After connecting the source and target, click on the Create Migration Job.
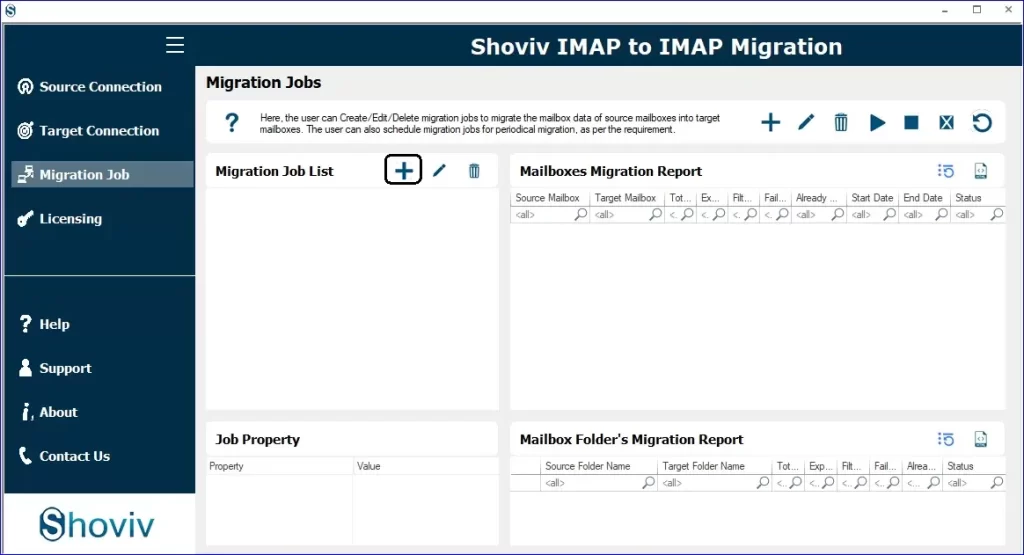
- To create a migration job, first name the job, then add the source. Add, in the same manner, Add Target. Click on the Next.
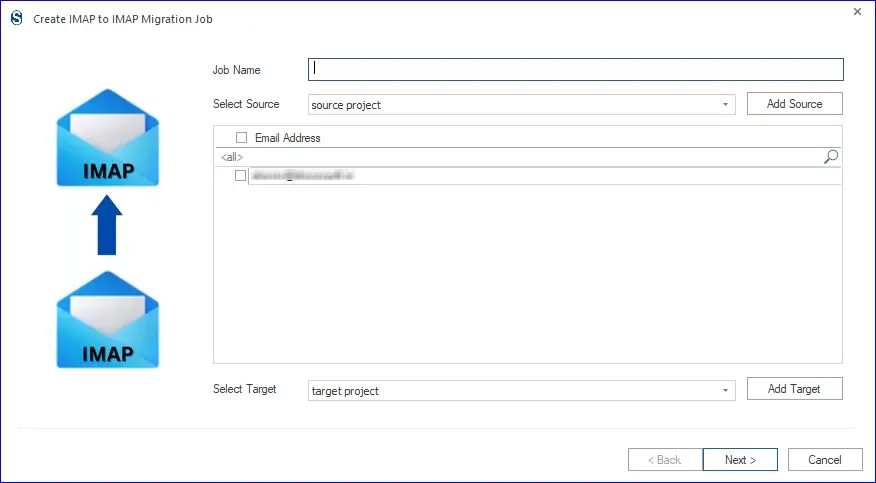
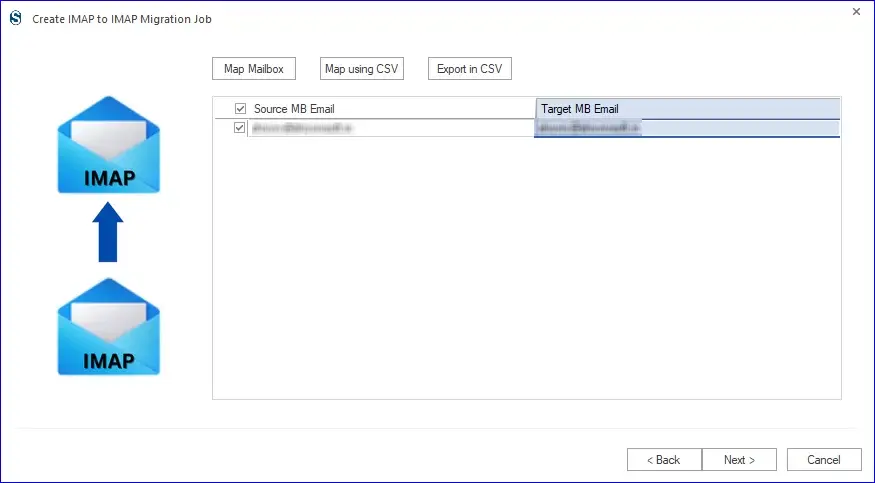
- Now, you will be promoted to the mapping page, where you can map source and target mailboxes. Click on the Next.
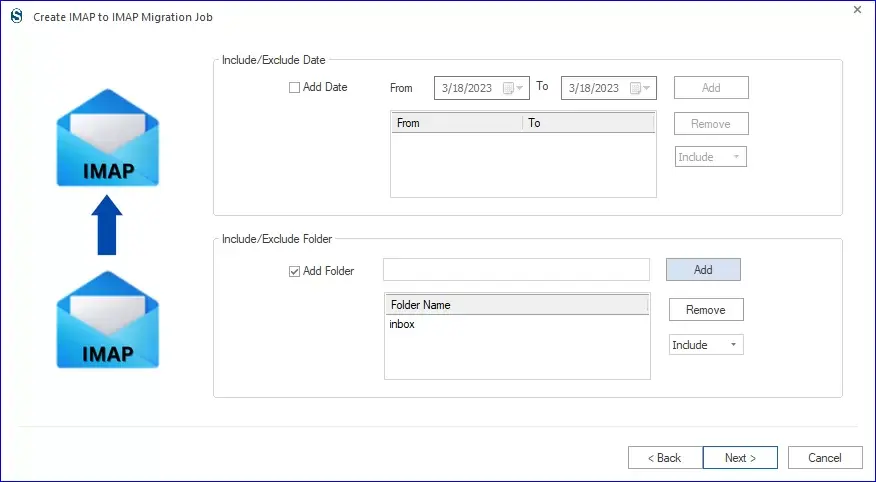
- The filter page will open now. Here, you can apply the filter according to the requirement. You can filter the emails based on the data range and folder. Move ahead by clicking Next.
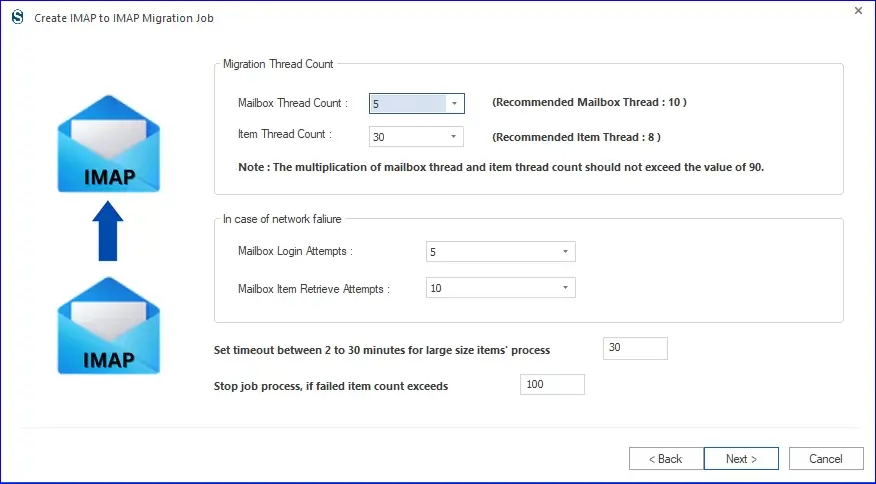
- You will be prompted to the Settings page. Here, you can set the thread count, attempts, and timeout for large items and failed item count.
- Now, you have to decide on the action. You can opt for a manual run or can schedule it if needed.
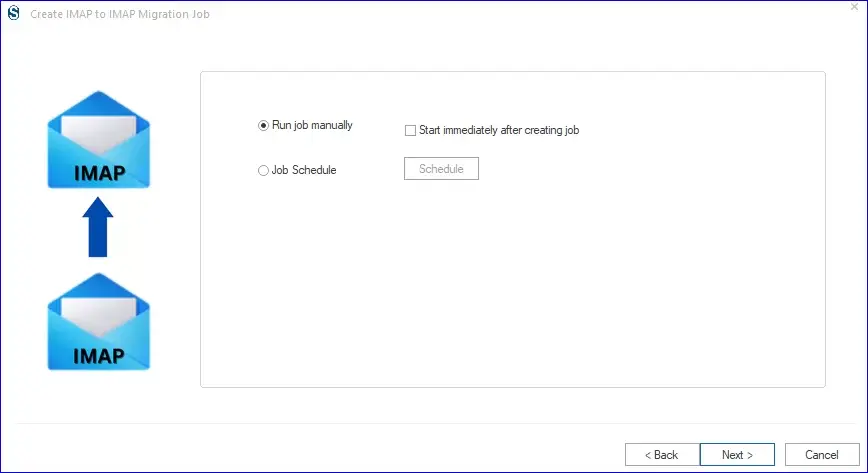
- If you want to schedule it, then adjust the migration job’s duration, frequency, and occurrence.
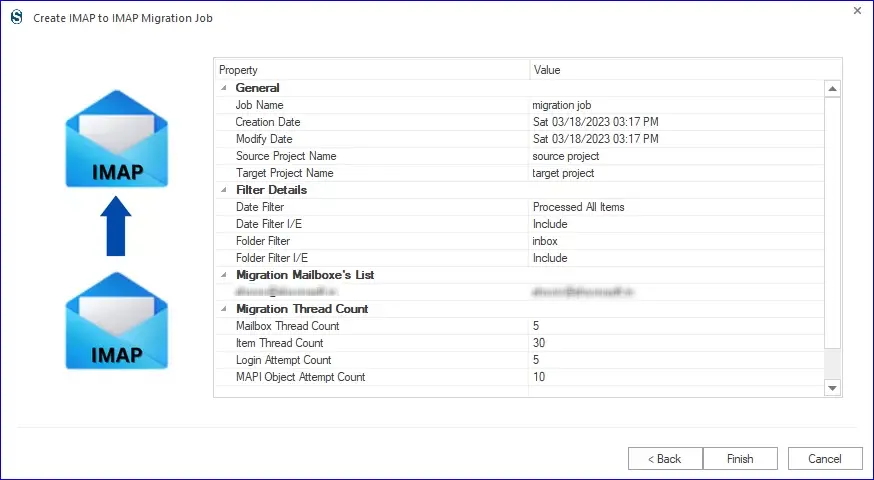
- Finally, you will have a preview of the migration job you created. If you want to make any changes, go back; otherwise, click on Finish.
- The migration will start as per the job-run action. You can see the report and save it for the future.
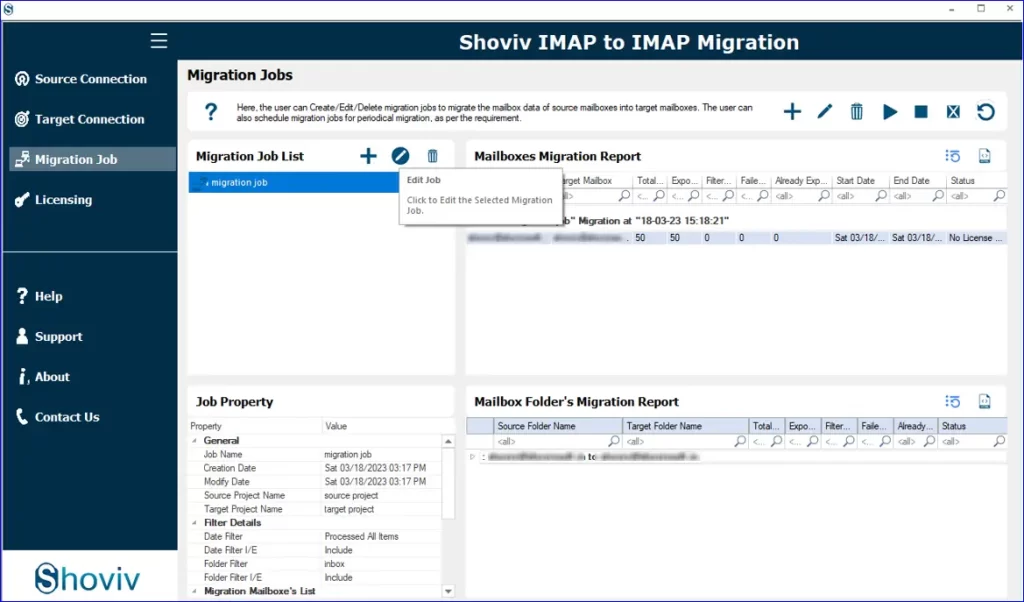
So, these were the simple steps to move Comcast emails to Gmail. Follow these steps and complete your email migration task.
Wrapping Up:
Comcast email users are searching for a way to migrate emails from Comcast to Gmail, and everyone has their reason for doing so. This blog explains the availability of the manual method for this migration but finds it not suitable for professionals. Professionals want an easy and one-stop solution to transfer Comcast email to Gmail, and Shoviv Software offers this. Shoviv IMAP to IMAP Migration Tool is a one-stop solution for email migration. A trial version of this software is also available to download. The free version processes the first fifty items per folder.
Frequently Asked Questions:
Ans. There is no need to get confused about Xfinity; it is just Comcast’s brand name. However, the Shoviv IMAP to IMAP Migration Tool is compatible with all email clients/servers (Using IMAP). You can use any email domain with this tool for email migration.
Ans. Yes, you can add all mailboxes for the migration in a single go. It is a job-based utility and allows the addition of multiple mailboxes in a single job. Moreover, you can create and run multiple jobs concurrently.
Ans. The demo version is just a restricted version of the full version. The demo allows migration of the first 50 items per folder, while there are no such limitations with the full version. If you are satisfied with the demo, you will be with the licensed one.
- Understanding Yahoo Mail Storage Limit & Back-Up Process! - April 10, 2025
- Mailspring vs Thunderbird: The Ultimate 2025 Showdown - April 3, 2025
- Why is My Outlook Offline? Quick Fixes to Get Back Online - March 26, 2025
