SharePoint Site is utilized as a digital space where teams can work together on projects and share important information with a group of people. It stores vital files and documents of the organization, which need extra protection to keep entire data safe from any unexpected chaos in the future. So, it has become a priority for users to back up SharePoint Site data.
This blog will deliver detailed and easy solutions to help users learn how to back up SharePoint Site data effortlessly. Thus, read this blog to the end and get a clear understanding of the solutions for completing this backup task.
Ways to backup SharePoint Site information
Users can put a couple of solutions into action to back up SharePoint Site data to their local drive. We will cover both traditional and modern solutions to finish this backup task. Let’s start by exploring a few common manual ways to back up data from the SharePoint Site to the local storage.
1. Download files and folders directly from SharePoint
SharePoint allows users to download files and folders to their preferred locations to protect indispensable data from accidental deletions or other unintentional blunders. Users can go after these steps to back up SharePoint site files and folders manually.
- On your device, go to the web browser and open it.
- After that, route to your SharePoint Site.
- Tap the Document Library to open where your files or folders are saved.
- Then, pick the files or folders you want to backup.
- From the toolbar, click the Download button. This will download the files or folders in .zip format in your system.
- Select a location where you want to store the downloaded .zip file.
2. SharePoint site backup using OneDrive for Business
Users who linked their OneDrive for Business to SharePoint can use this simple approach to back up SharePoint site data. The below instructions will guide users on how to get their SharePoint site data into the local machine.
- Proceed to your SharePoint site.
- After that, click the document library to pick files or folders you want to back up.
- Next, tap the Sync button from the tool panel and follow on-screen suggestions to set it up completely.
- Once done, the selected files or folders will be synced with OneDrive for Business.
- You can easily find all the synced items in the OneDrive folder on your device.
- Copy and move folder data to the desired location to have a backup of SharePoint site data.
3. Backing up SharePoint data via PowerShell commands
Engaging with this solution will enlighten users on the SharePoint site backup procedure through PowerShell commands. The steps are outlined below; users can use them to back up SharePoint site data effectively.
- The leading step includes installing the SharePoint Management Shell if you have not done so.
- After that, execute the following command to connect SharePoint Online.
# Replace with your SharePoint admin URL and credentials
$adminUrl = "https://yourtenant-admin.sharepoint.com" $credential = Get-CredentialConnect-SPOService -Url $adminUrl -Credential $credential- Then, type the PowerShell script below to back up a list in CSV format.
# Replace with your site URL and list name $siteUrl = “https://yourtenant.sharepoint.com/sites/yoursite” $listName = “YourListName”
# Get the list items
$listItems = Get-PnPListItem -List $listName -Web $siteUrl $listItems | Export-Csv -Path "C:\Backup\YourListBackup.csv" -NoTypeInformationApply these steps to backup SharePoint site data using the PowerShell commands that we shared in the above section. To carry out this method, users are required to be SharePoint administrators in the Microsoft admin center.
Why is backing up manually not an ideal choice?
Conducting manual solutions is daunting and also has several drawbacks. For this reason, we can’t consider manual methods as a perfect option for users to back up SharePoint site data. Users can review the points shared below to grasp the typical limitations of the manual solutions.
- The manual solution may involve a lengthy process, particularly when users seek backup sites with ample content.
- Moreover, it is not equipped to back up entire data from the SharePoint site; it is only able to back up partial data, like specific lists or libraries.
- Also, users are restricted to a backup list or library without accompanying all version’s history.
Users can face additional limitations while taking SharePoint site backups using manual approaches. So, users must consider professional automation for a better, more effective strategy to complete backup conveniently.
How do you back up the SharePoint site efficiently and quickly?
Users desire a robust tool to lead the SharePoint backup task safely and effortlessly. So, we are here to introduce a simple solution to cater to users’ needs. Shoviv SharePoint Backup Software is popular among experts, as it performs the backup process with no hurdles. This software makes it possible to back up forms, site libraries, site pages, etc., and all version history in just one click. Users from non-technical backgrounds can also back up their SharePoint data to the local drive using this professional automation.
It also offers a range of filter options to carry out selected items for backup, like library filter, extension type, sub-site filter, etc. This tool can conduct various jobs in parallel without impacting the process’ speed. It includes an easy-to-use interface, allowing users to easily command over the tool to back up SharePoint site data.
Quick guide for SharePoint site backup
- Launch the Shoviv SharePoint Backup Tool.
- Create a connection by adding your SharePoint.
- Create a Backup job and filter items if needed.
- Use the schedule job feature to back up data periodically.
- Review backup job settings and click Finish.
The in-depth procedure of the Shoviv SharePoint Backup Software
We recommend that users first download and install the Shoviv SharePoint Backup Software before following the steps below to back up SharePoint site data.
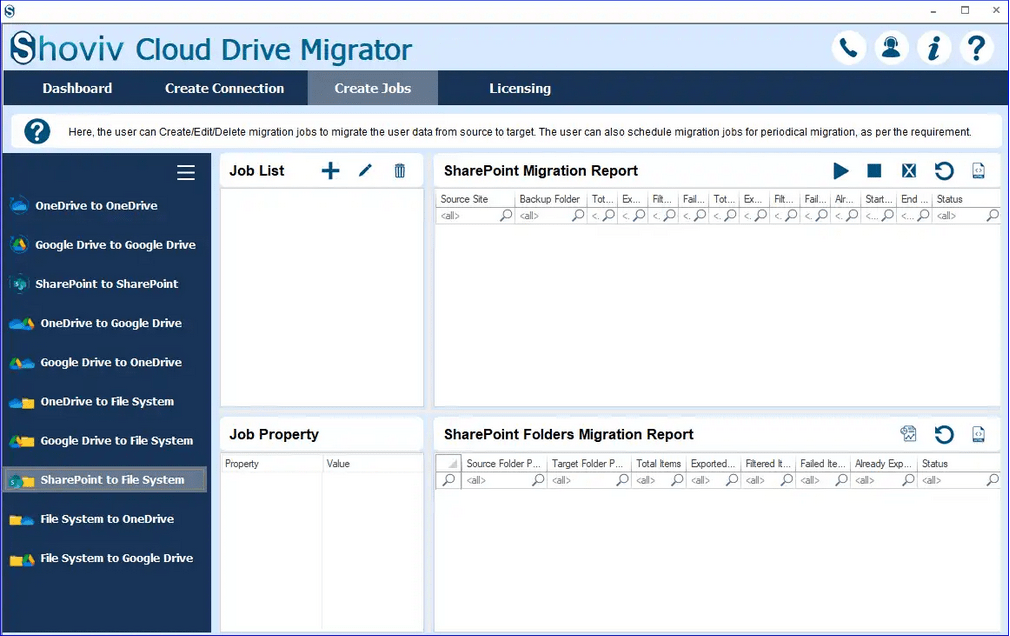
- Open the tool and head to the Create Connection tab.
- Then, click the Add (+) button to create a connection between the software and SharePoint.
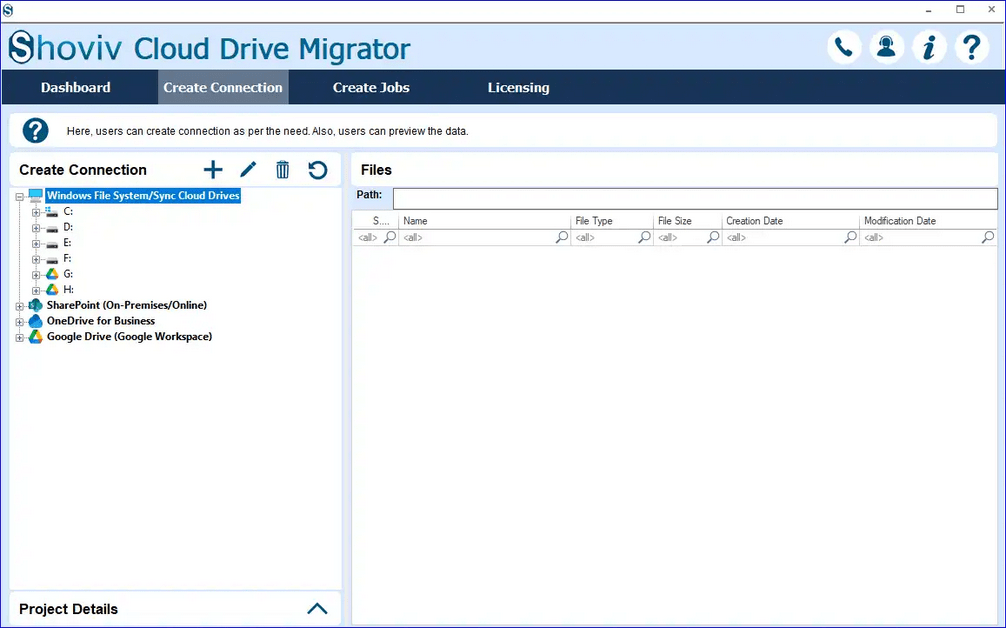
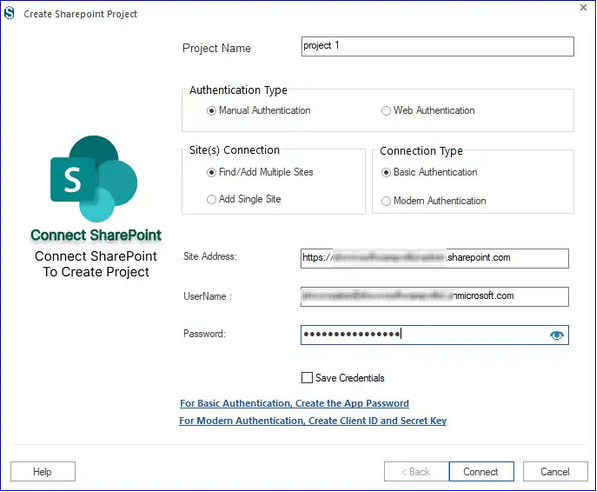
- You will get a variety of options to make connections, like manual and web authentication. Enter the project name and other details that are needed to connect SharePoint and hit the Connect button.
- Once you successfully connect the software and SharePoint, navigate to the Create Jobs tab and select the SharePoint to File System option.
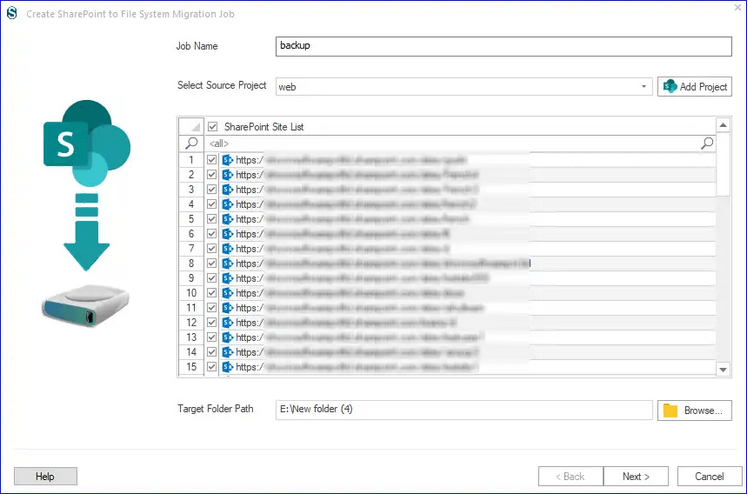
- Type the job name, add the source, select sites from the list you want to process, and browse the target folder location. Then, click the Next button.
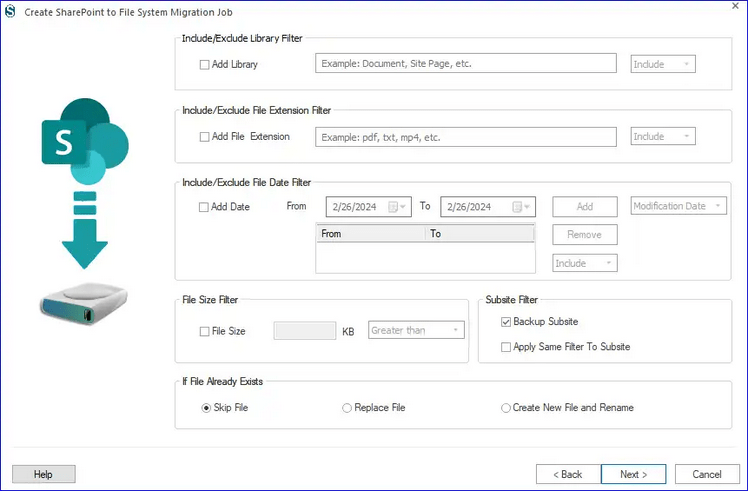
- After that, implement multiple filter options to select or omit items from the backup task, such as Date Filter, File Size Filter, etc.
- Next, choose how to handle files in the target: replace the file, create a new file and rename, and skip the file. Tap on the Next.
- Set the thread count, define user login attempts and item retrieval attempts, and tick an option from the item log.
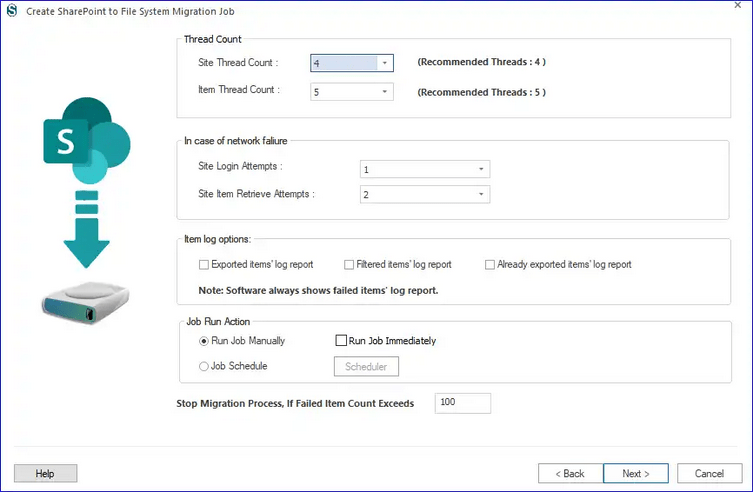
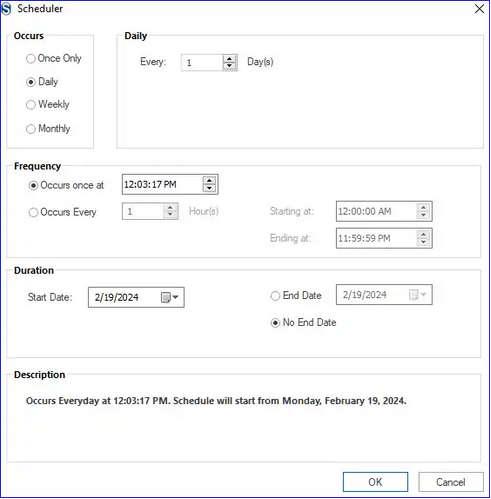
- Then, schedule the backup job to process regularly, including options like daily, weekly, monthly, or at a specific date and time. You can also choose to run the job immediately after creating it and hit the Next button.
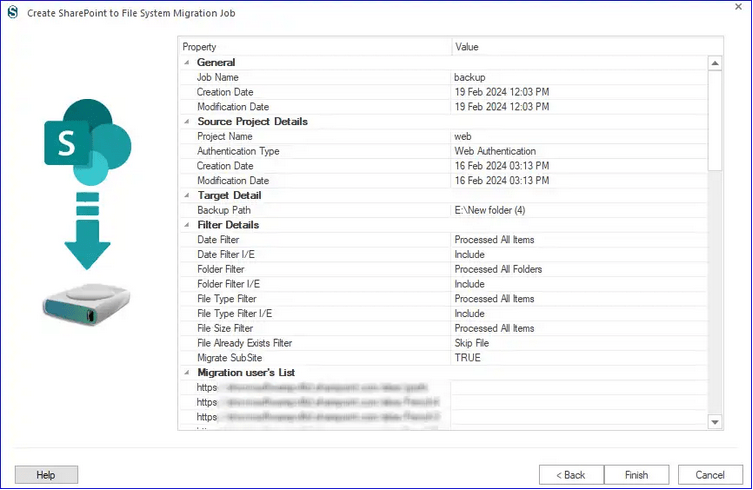
- Verify the backup job settings and click the Finish button.
Ending Remarks
This blog outlines multiple solutions for users to back up SharePoint site data into the local drive. Users should refrain from manual methods to perform this task, as they might take too much time and need to be more efficient in completing this backup task. Instead, choosing the Shoviv SharePoint Backup Software would be an ideal choice for the users. It allows users to process numerous SharePoint sites at once without affecting the original speed of the process.
Moreover, it comes with a range of features so that users can quickly process backup tasks in a hassle-free manner. Users can also explore its free demo version, allowing them to process items up to 20 kb to the target freely.
Popular in SharePoint:

- How to Import or Export Contacts in Any Outlook Version? - March 31, 2025
- Understand Groups & Permissions on a SharePoint Site - March 21, 2025
- My Outlook Emails are Stuck in the Outbox! What’s Going On? - March 12, 2025