Distribution List in Outlook or Office 365(Outlook 365) helps users to share a particular mail with many others in a single go. As its name clarifies, it helps users create a separate list of members you usually send a particular email to. When you work in a large organization, entering details one by one is a tedious and time-consuming task. The bundle recipients list is practically a boon for the manager/ team leaders or administrators. In this write-up, we will learn all about the distribution list, including its uses, creation, and handling. Be with the blog till the end and know all about the Outlook distribution list.
See How You Can Use Outlook Distribution List:
- You can mark a list as “unlisted,” and your list will be hidden if you search for it.
- You can set moderation settings so you can review the messages before actually sending them.
- The list creator can enable users to remove from the distribution list if needed.
- You can set who can send to the created distribution list.
Learn How to Create a Distribution List in Outlook:
- Create an Outlook Distribution List (Office 365)
- Login to Outlook in Office 365.
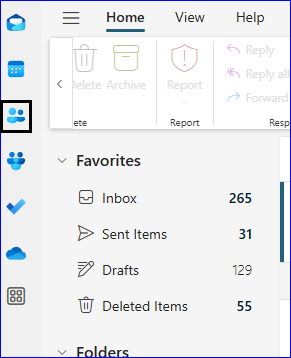
- Click on the People icon present on the left pane.
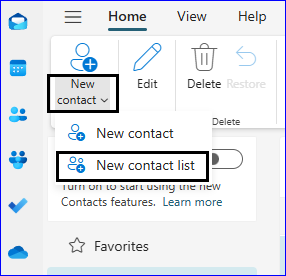
- Tap on the New Contact’s drop-down and choose New Contact List.
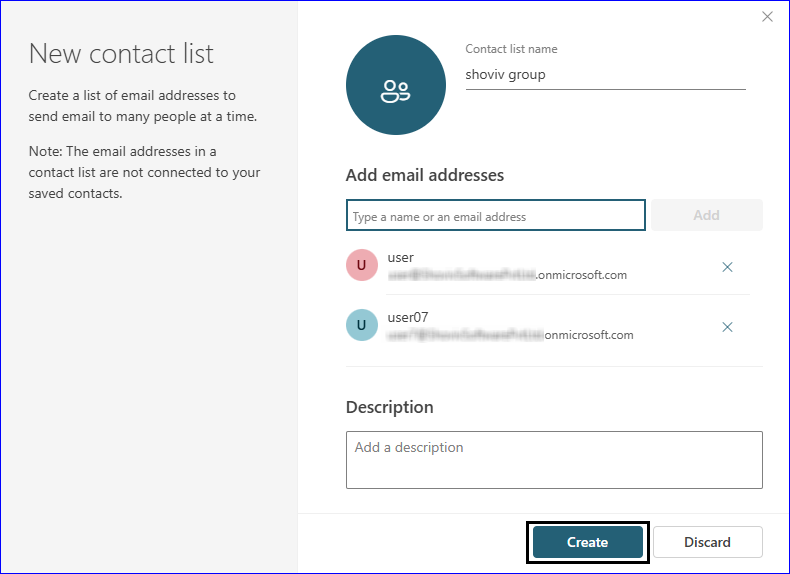
- Name the contact list and enter the email addresses. Also, provide a description for the newly created distribution list. It will help to understand the purpose of the distribution list.
- When done, click on Create.
- Create a Distribution List in Outlook on Windows (Desktop Outlook)
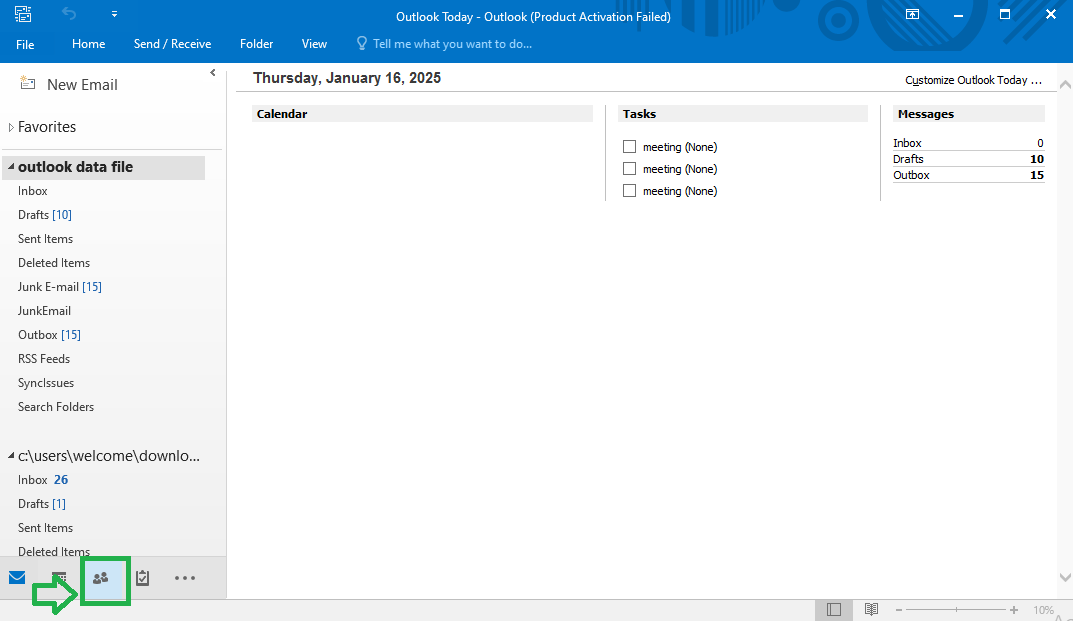
- Launch the Outlook and select the “People” at the bottom of your screen.
- Click on the “Home” and click on the “New Contact Group”.

- Moreover, name the Group so you can easily identify it.
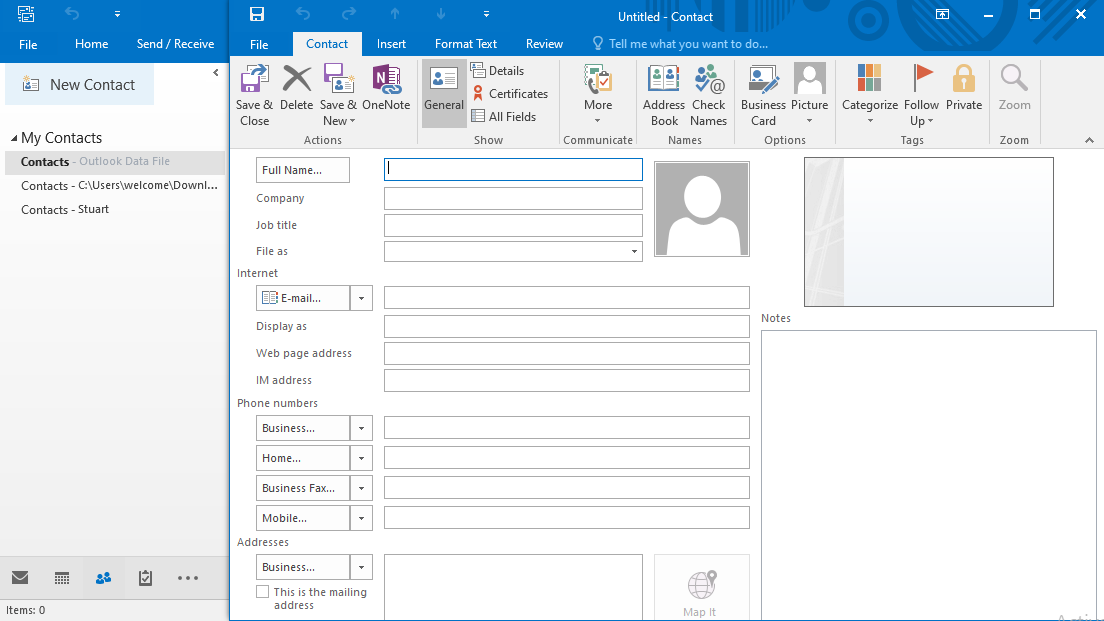
- Click on the Add Members. You can add From Outlook Contacts or From Address Book or you can add New E-mail Contacts.
- Select the intended recipients for the list.
- Finally, click on “OK” and then “Save & Close”.
- Steps to Create Outlook Distribution List on Mac
- Launch the Outlook on Mac.
- There is a People icon at the bottom.
- Now, from the toolbar, click on the New Contact.
- Just name the new Contact list and double-click on the empty list to add the recipients. You can add multiple recipients for ease.
- Finally, click on the Save and Close.
So, these were the steps to how to create a dl in Outlook.
Protect your essential emails by backing up:
We all know how important emails are for an organization. Having a backup of emails is a good practice, and all organizations should follow it. See how having a backup helps users in an unwanted, unforeseen condition:
- Users can archive emails in the local system and better manage their storage space.
- Users can access their emails in case of connectivity issues or server downtime.
- A backup of emails in the PST file format allows users to access the data just by adding the PST file to any Outlook account.
- In case of accidental deletion of emails, a backup comes as a boon for the organizations/company.
Also Read: How to Migrate Distribution Lists to Office 365(Exchange Online)?
How do professionals back up Outlook/Office 365 mailboxes?
To back up emails, professionals always look for professional third-party software. Shoviv Office 365 Backup and Restore Tool is a one-stop solution for storing mailboxes in the local file system. Let’s see what else this professional utility offers:
- Users can back up Office 365 and Exchange On-Premises mailbox to local.
- The software offers PST, MBOX, EML, MSG, HTML, and MHT as commonly used file formats.
- Users can also restore the email data from the file format to their mailbox. Users can also restore/export OLM files to mailboxes.
- Shoviv Office 365 Backup and Restore Tool runs over job-based processing, and users can back up multiple mailboxes in a single go.
- It also facilitates backing up shared mailboxes.
- The same software, using the appropriate license, can also back up OneDrive data.
- The software offers multiple user-centric options/facilities like incremental backup facility and periodic scheduling facility. Once you schedule the backup, the software automatically takes back up.
Gist of the Blog:
A distribution list is a handy feature that Outlook provides. It helps managers/ admins to send an email to multiple users that are intended recipients. In this blog, we learned how to create a distro list in Outlook. Moreover, all the distribution list Outlook emails are essential for all, like other emails, and need special care. Backing up mailboxes is a good practice that most of the users follow. Shoviv Office 365 Backup and Restore Tool is a one-stop solution. A free demo version of the software is also available, allowing users to run and test the software. Users also get free technical support with the Shoviv Office 365 Backup and Restore Tool.
- How to Export Calendar from Outlook on Microsoft 365? - April 15, 2025
- Understanding Yahoo Mail Storage Limit & Back-Up Process! - April 10, 2025
- Mailspring vs Thunderbird: The Ultimate 2025 Showdown - April 3, 2025
