Archiving always favors users as it helps users to have a backup that comes as a boon if there is any accidental deletion-like issue. Users can easily access the data if needed, as data remains in their local storage. A lot of users search for how to archive emails in Outlook 365. As Outlook 365 is a cloud-based service, users want to archive Outlook 365. However, the reason for Outlook 365 archiving may vary from user to user.
In this write-up, users will learn, how to archive Outlook 365 email in an advanced way. A detailed process of Office 365 email archiving is explained in this blog. Be with the blog until the end and complete your task in simple steps.
First, Let’s Have a Look at Why Users Do Outlook 365 Archiving.
However, the reason for Office 365 email backup/ archive Outlook 365 to a local drive varies from user to user still some of the common are:
- Dealing with data loss for any reason, including accidental deletion chances of unauthorized access, like unwanted situations.
- Many users also archive Outlook 365 emails to local storage to free up cloud storage. It helps to maintain mailbox size.
- By having data in the local storage, you can access it even in the absence of a network.
Is your Office 365 mailbox brimming with messages, threatening to swallow important emails
whole? You're not alone! But fear not, email overload doesn't have to be your reality. With
MVP recommended solution Shoviv Office 365 backup tool, you can perform a seamless
archiving of Microsoft Outlook 365 emails to PST files.
So, how to archive in Outlook 365?
For the professional handling of the data, a professional tool remains the user’s first choice. But, still, some users search for a manual way; hence, I am explaining this too.
Manual Way to Archive Outlook 365 Through E-Discovery):
- Login to Office 365> Admin> Exchange.
- Click the Permission>>Admin Roles>>Discovery Management.
- Click on the (+) to add roles and click “Mailbox Import/ Export“.
- Here, again, click (+), click once on the user’s name, and finally click on Save.
- The next step is to go to the “Compliance Management>> in-place e-Discovery & hold“>> (+).
- Enter a name>>Next>> “Search All Mailboxes” >> (+).
- Now set the filter and click on the Next.
- From the “In-Place Hold Settings“, do settings for the retention period. Click “Finish“.
- After getting confirmation, click on “Close“.
- Ultimately, click on the download to archive Outlook 365 in the PST file format.
Wait! If You Are Thinking of Going with the Manual Method:
With the manual way, some drawbacks and limitations are associated, and every user should be aware of them. Some of them are:
- As you can see, the manual method is very complicated and technically difficult.
- It is a very tedious and time-consuming task, hence not suitable for professionals.
- Users don’t get the advanced options/ features useful for properly handling Outlook 365 archiving.
- Chances of human error are always there; hence, there is always a chance of data loss.
How to Archive in Outlook 365 Professionally?
A professional tool is a must thing for picture-perfect Outlook 365 email archiving. Shoviv Office 365 Backup and Restore Tool is an expert tool for Outlook 365 Archiving. This utility is boosted with multiple advanced features and facilities, some of which are:
- Users can archive Outlook 365 mailboxes without any restriction on the number and size of mailboxes.
- There are multiple formats in which a user can achieve Outlook 365; some are PST, MBOX, EML, MSG, HTML, and MHT.
- Advanced features like Scheduler, Filter, Full and incremental facility allow resuming.
- It runs on the job—based processing that allows users to create and run multiple jobs simultaneously. You can add multiple mailboxes in a single job.
- Users can also export/restore PST, OST, OLM, MBOX, MSG, EML, ICS, and vCard file formats Office 365 mailbox with the tool.
- Users can also backup/restore Office 365 Groups.
Professionals’ Way to Archive Outlook 365:
- First, install and launch the Shoviv Office 365 Backup and Restore Tool.
- Click on the Connect Office 365 tab from the dashboard.
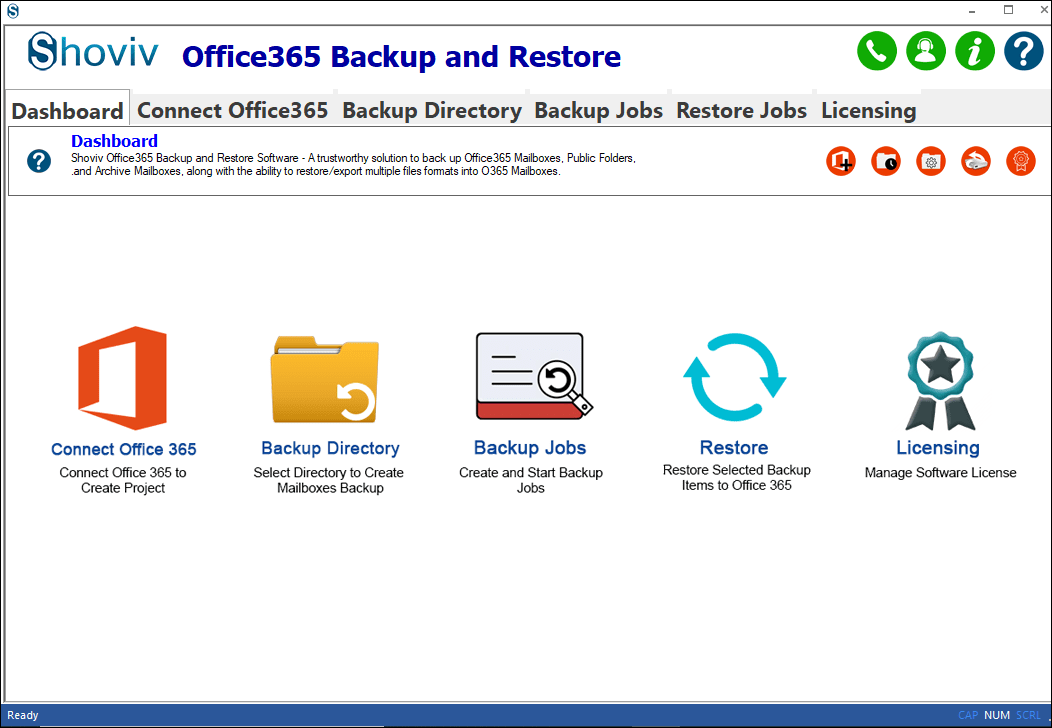
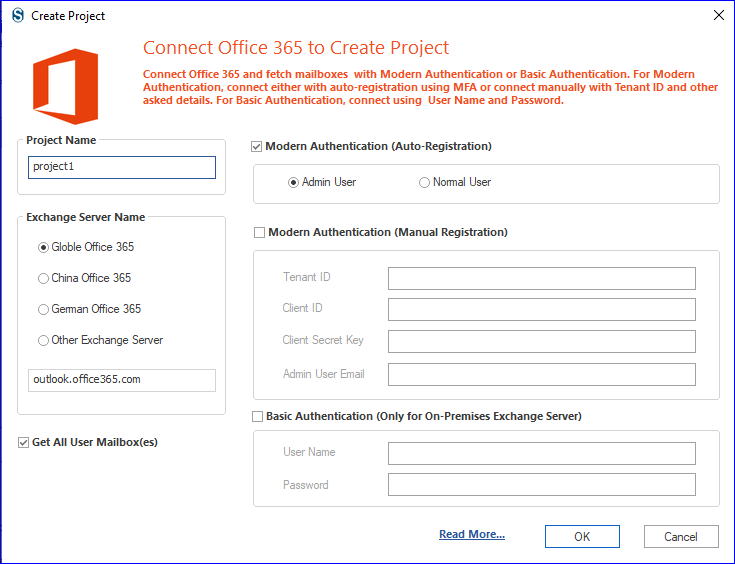
- Enter a project name, Select Server as the Global Office 365, and go with the Modern Authentication (Admin User) option to connect.
- Now, using the Backup Directory tab, give a name to Backup Directory and Browse the Backup Directory Path where Outlook 365 emails will be archived.

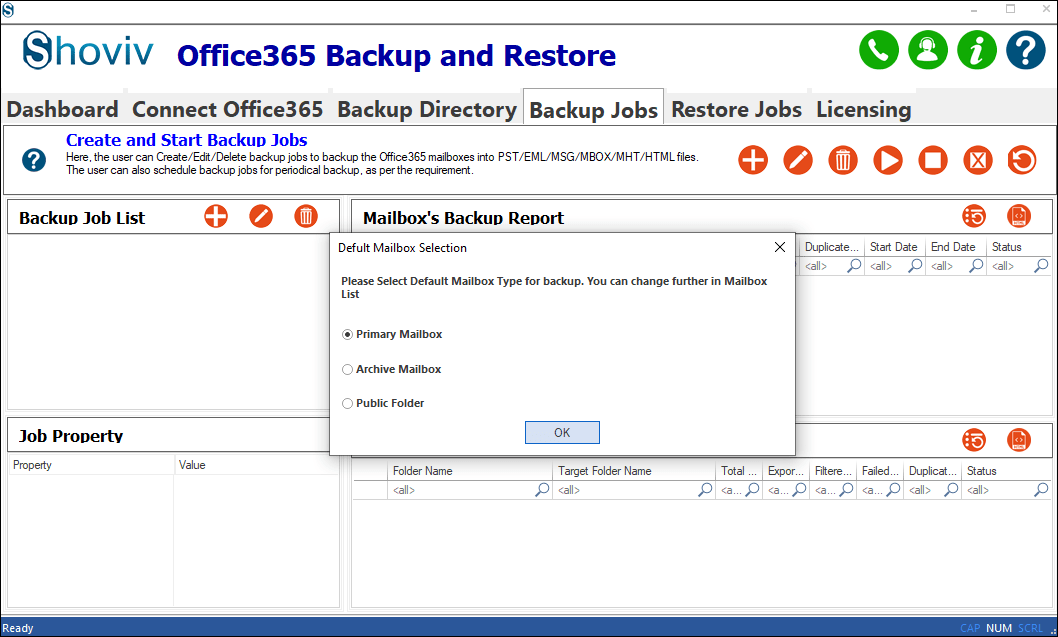
- The most important task is to create a backup job. First, select the default mailbox type.
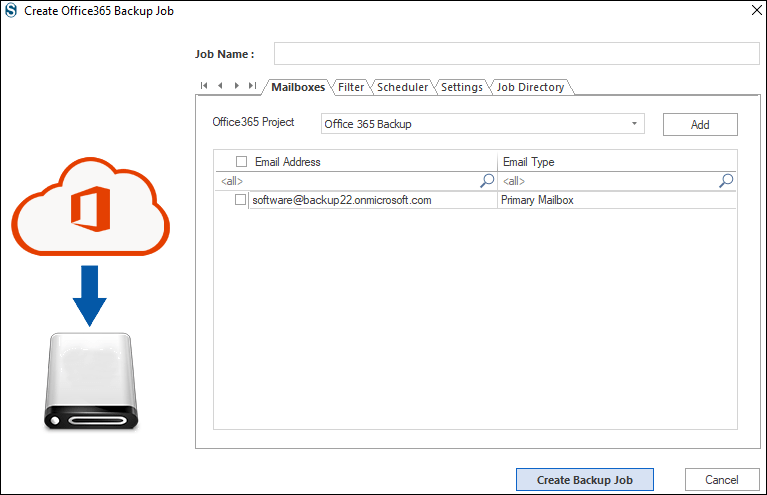
- Give a name to the job, add Office 365 Project (connected to Office 365), and check the mailboxes.
- Now, you will be prompted to the Filter Page, where you can apply the filter based on the date and folder.
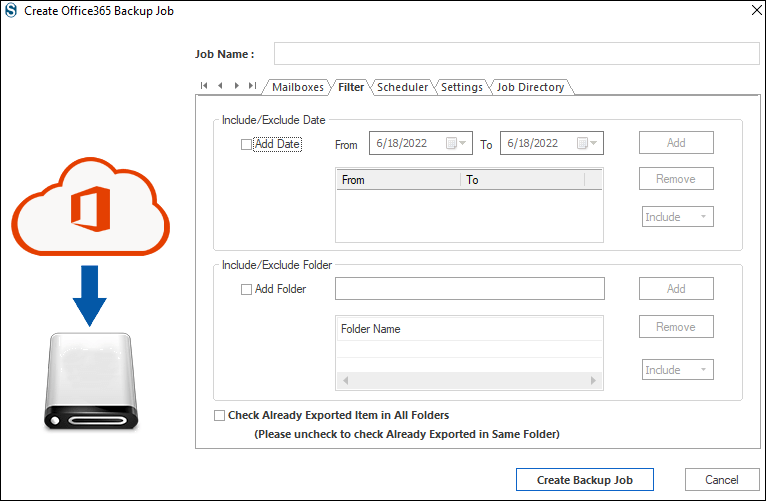
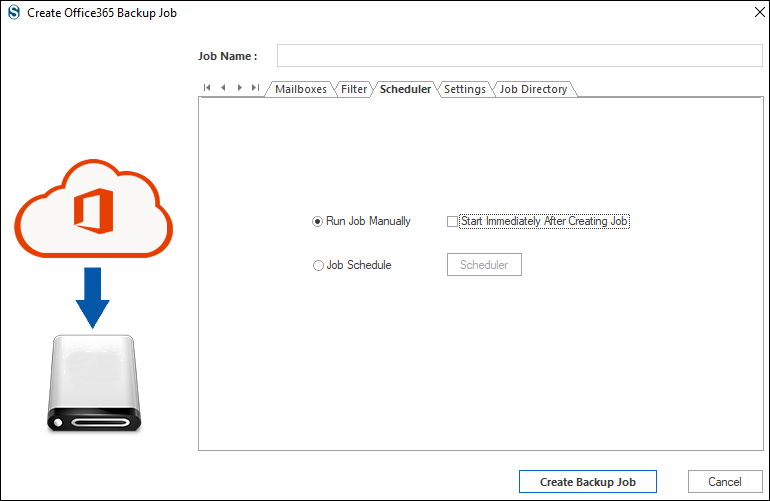
- Here, you can set the job run action under the Scheduler tab. You can set the occurrence, frequency, and duration to schedule the job.
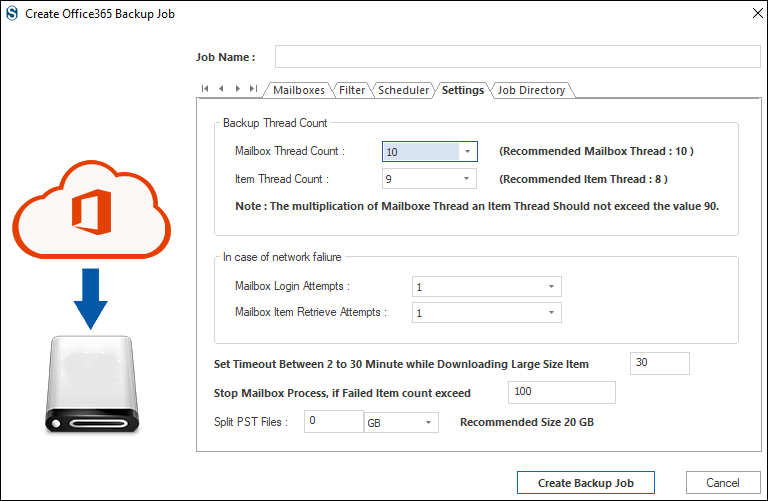
- Now, from the Settings tab, apply the settings as per the need for the task.
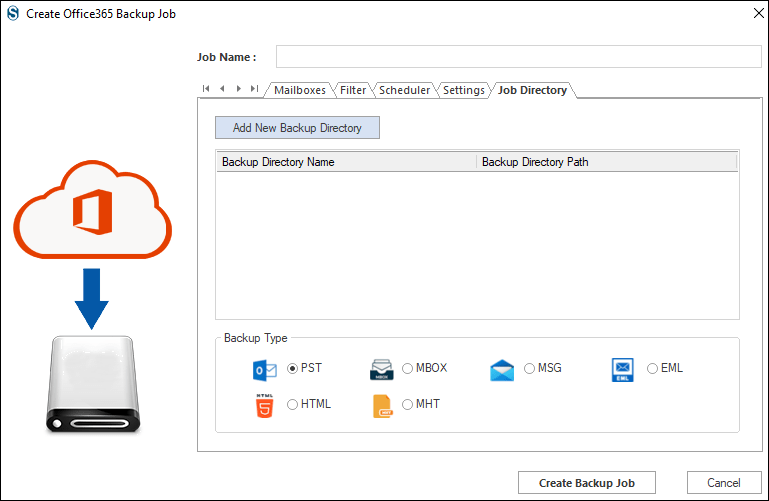
- Finally, under the Job- Directory tab, you can add a new job directory; however, we have already added one. Also, select the file format to archive Outlook 365 emails. Click on the Create Backup Job.
The job will run as per the job run action. If you choose manual running, click on the Start button; otherwise, the job will run as per the settings.
Final Words:
Many users prominently search for how to archive emails in Outlook 365 to a local drive; hence, this write-up explains a detailed guide. This blog explains a manual method, but professionals always need an efficient and effortless way. Shoviv Software has developed an advanced tool with multiple user-friendly features for this task. A free trial version of this tool is also available that allows users to process the first 50 items per folder. Users also get free technical support with the Shoviv Software.
- How to Export Calendar from Outlook on Microsoft 365? - April 15, 2025
- Understanding Yahoo Mail Storage Limit & Back-Up Process! - April 10, 2025
- Mailspring vs Thunderbird: The Ultimate 2025 Showdown - April 3, 2025

